 When darkness sets in, beginning photographers like some of you, would just pack away your cameras and go home to watch your favorite telenovela. Some of you, however, might automatically turn on your camera flash. While your flash is an oftentimes indispensable tool, it creates harsh shadows, and there are situations when your flash output won’t be enough to properly illuminate your subject.
| Free articles and cheat sheets from Digital Camera World: Night photography: how to shoot popular low-light scenes Night photography: set up your camera to shoot anything 12 common errors of night photography (and how to fix them) Night photography tips: 9 essential steps for beginners |
(I have been using a borrowed amateur model digital camera for only a short period of time. So I don’t know yet how to shoot pictures at night using a digital camera. But once I learn how, I will tell you about it, okay?)
Here’s how to use the B-setting:
(1) Place your camera on a tripod, a table or any sturdy structure.
(2) Attach a cable release to your shutter release button.
(3) Focus on your subject.
(4) Fire the shutter, lock the cable release.
(5) Release the lock after you reach your desired exposure time.
Use a watch with a seconds hand to time your exposures. Keep a flashlight handy also, so you can always check on your settings and surroundings. Make sure you’re not stepping on a snake or something, okay?
Reciprocity failure
Take note that with long exposure times, "reciprocity failure" will occur. What does this mean? The effective ISO rating of your film decreases, resulting in underexposed shots. What’s the solution? Adjust your lens opening; using still longer exposure times will only worsen the problem. (If you're using a digital camera, there's no need to worry about reciprocity failure, okay?)
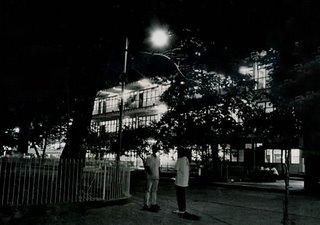
Believe it or not, the picture above (which I took way back during the 1993 National Secondary Schools Press Conference held in Rizal High School in Pasig) became controversial. When we published this picture in our yearbook, a lot of people said that the three people on the lower left hand corner were ghosts! They said, “Look at their clothes, they’re like those worn by our Spanish ancestors. And look, their images aren’t solid. They’re transparent, the light just goes through them.”
 Look at the picture above. These aren’t ghosts; they’re my staffers whom I asked to pose underneath the lamp post. I used f/5.6 as lens opening and 30 seconds as shutter speed. Somebody walked by, between my staffers and my camera which was set on a tripod. But where is he in the picture? No matter how and where you look, you won’t find that guy. Why? He did not stay in one place long enough to be recorded in my film.
Coming back to the controversial picture above, these three people (delegates from Region 10 or 12, if I remember right) stayed in their place long enough for them to be recorded on film. But since they were moving about a little (I used f/8 at 45 seconds), their images aren’t solid but blurred, almost transparent, lacking solidity. This kind of images is called “ghost images.” Ghost images, not actual ghosts, okay?
Light streaks and trails
If your subject includes fast moving vehicles, you won’t be able to record them on film since they wouldn’t be staying in one place long enough to be recorded. But you will be able to record their lights in terms of streaks and trails. If you’re shooting color film, the light trails will be red (for brake lights) and yellow (for headlights).
Auras and Kirlian photography
Psychics believe that every person projects an “aura” which are visible to them but not to others. “Kirlian photography,” a process developed by the Russians (I stand to be corrected on this, okay?) is said to be able to record on film a person’s aura. Actually, this process records electrical discharges emitted by the human body.
How to focus when shooting at night
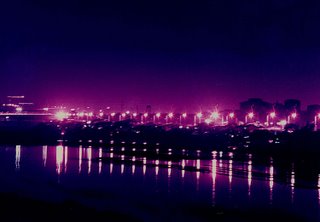
Because of the darkness, you might find it difficult focusing on your subject. Solution? Try focusing on distinct points of light near your subject, like the streetlights in the picture below. I took this picture of the floodway in Pasig sometime in 1997 or 1998. I used my beloved Canon AE-1 Program camera and a Vivitar 28-210 mm zoom lens to take this shot. The streetlights seem a bit out of focus; that’s because I took the shot from the middle of the Legaspi Bridge spanning the two banks of the floodway. A lot of vehicles were moving across the bridge, and, although mounted on a sturdy tripod, my camera would shake a bit as vehicles passed by. (As motorists passed by me, some would tease me by saying, “Kami na lang ang kunan mo!”)
 Also, you’ll notice that when you have locked your cable release, you wouldn’t be able to see your subject through the viewfinder. This “image blackout” occurs because the rapid return mirror is blocking your view of the image.
Bracketing your shots
It is really only experience which can tell you how long your exposures should be. Always bracket your shots, therefore. This simply means to take several shots using different exposure times. (Of course, with photo editing software, you can edit and manipulate your images to your heart’s content and to achieve the look you want.)
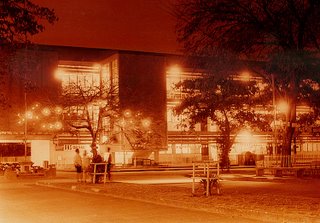
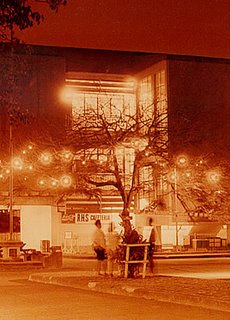
 If you use small apertures or lens openings (more on this topic later on), you’ll create cross screen patterns similar to the effect created by starburst filters. In the picture above, you can see these patterns in the lights hanging on the trees.
On the bottom portion of the picture above, what can you see? Oh, my ghosts!

No comments:
Post a Comment