
 The essence of portraiture is to capture or express an individual’s personality, to show something about the person’s life or work. As such, portrait photography need not be confined within the studio; it encompasses all kinds of ways of portraying people (like the so-called “environmental portrait” which we’ll discuss below).
Furthermore, portraits can be close-ups, full shots (from head to foot) or long shots (the individual shown in relation to his or her environment).To do portrait photography on a limited, shoestring budget, we have to consider three things: the lens to use, the light source, and the physical setting.
You can use your standard 50 mm lens for portraits; maintain a distance of about 5 feet or more for a head and shoulders shot.
If you’re using a zoom or telephoto lens, take note of your minimum focusing distance.
The so-called “portrait lens” has a focal length of 85 or 90 mm.
Avoid using a wide angle lens for close-up portraits. Why? The lens will cause distortions and exaggerations of the nose, the forehead, etc. For environmental portraits however, you can use a wide angle lens.
What about digital cameras? Point and shoot digital camera models oftentimes have zoom lenses with a wide angle to telephoto range. Use the camera's wide angle setting for environmental portraits and the telephoto setting for head and shoulders portraits.
Light sources for portraits
Your light source can be your camera flash, ordinary room lights, or sunlight through windows or doors.
On-camera flash (that is, flash placed in what is known as your SLR camera’s hot shoe), however, gives a frontally lit portrait with harsh shadows in the background. Solution? Shoot from a high angle so that the shadows would be hidden behind your subject (we will be taking up flash photography later on).
Be careful if you’re using flash as your light source for portraits. Some people, react instinctively to flash by closing their eyes. Solution? Shoot a lot of pictures, so you’ll have a lot of pictures of your subject with eyes closed ... just kidding! What usually happens after the second or third burst of your flash is that the subject becomes used to the flash.
 Since we’re doing portraits on a shoestring budget, the light source need not be expensive, elaborate studio lights with umbrellas, reflectors, etc. In the picture above, my yearbook staffers and I had covered up all the windows of an abandoned room with newspapers, thus plunging the whole room into darkness, except for the light coming from the slightly open door.
The physical setting for portraits
In “environmental portraits,” we use the person’s natural, normal surroundings as the setting, instead of a studio. These could be any place where the setting could possibly say something about the person’s character.
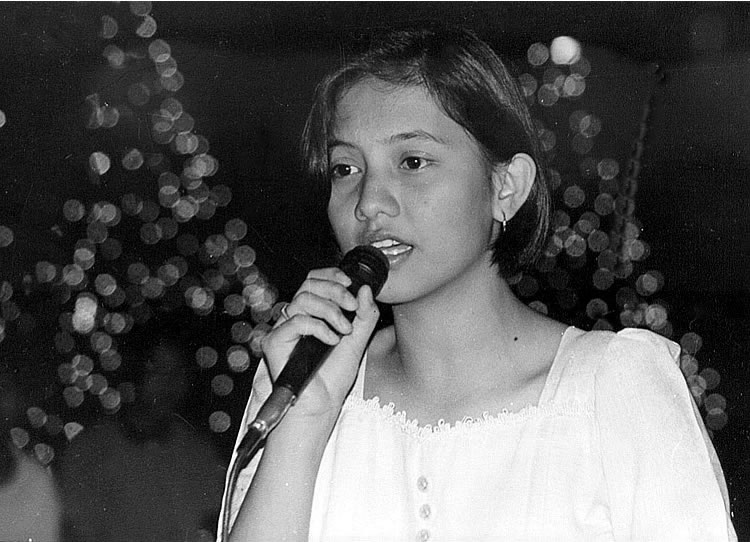
The girl in the very first picture of this post was a very talented singer in our school a decade ago. Naturally, I wanted to show that aspect of her personality. I wanted a head and shoulders portrait, but decided that a horizontal format would be better than the usual vertical format for portraits. I also framed her between the Christmas trees. Since I had used my Vivitar 28-210 mm zoom lens set at its telephoto end and had shot her at about ten feet away, the lights became gorgeous looking, out of focus highlights. Looking back now, I really wish I had used color film to take this picture!

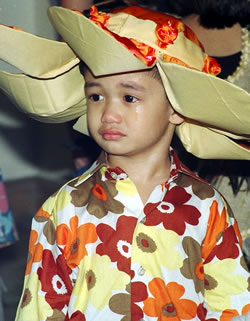 The pictures above (in full color!) are another example of environmental portraits. It’s a portrait of my nephew Gino in his natural environment – with his dolls and toys, and with a flower hat during a school presentation in Greenhills Christian Fellowship. Gino is cute because he looks like me. Hey, what can I say? Cuteness is in our genes!
Horizontal or vertical formats for portraits
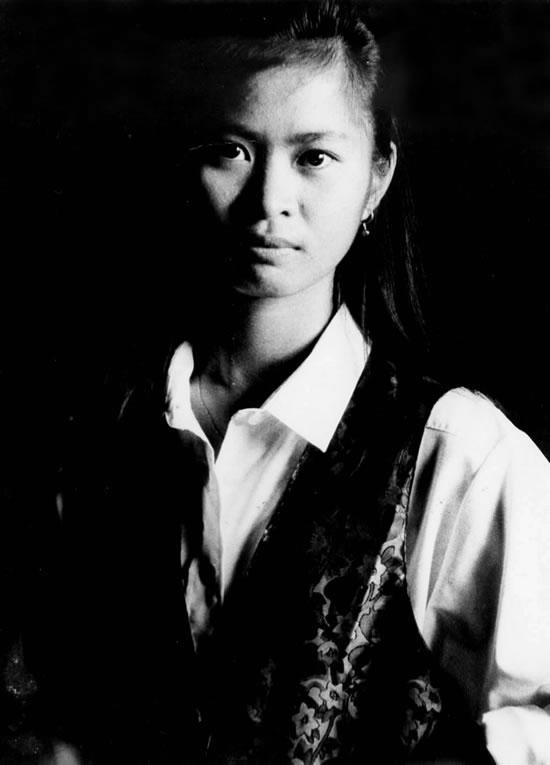
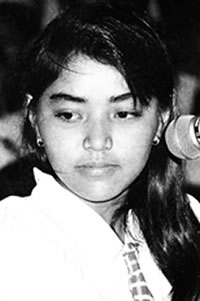
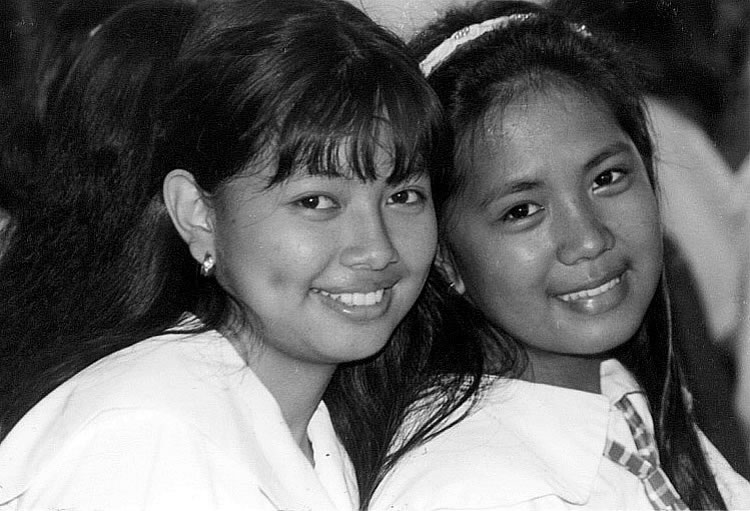
Remember our lesson on formats? We usually shoot vertically when doing portraits. If you can’t decide however whether a vertical or horizontal format would be better, shoot your subject in both formats. Or, you can shoot a horizontal portrait like that of Rachelle in the first picture below. Later on, you can crop the image to come up with a vertical format portrait as in the next picture below.

 What if you want to shoot somebody’s portrait but you’re in the wrong location, you don’t have the right viewpoint as when your subject’s back is turned towards you as in the two pictures below? What do you do? Call out your subject’s name to get his or her attention. When your subject turns towards you, take the picture. For example, you can say, “Hey, Angel! Kahit isang sulyap lang, Darna!”
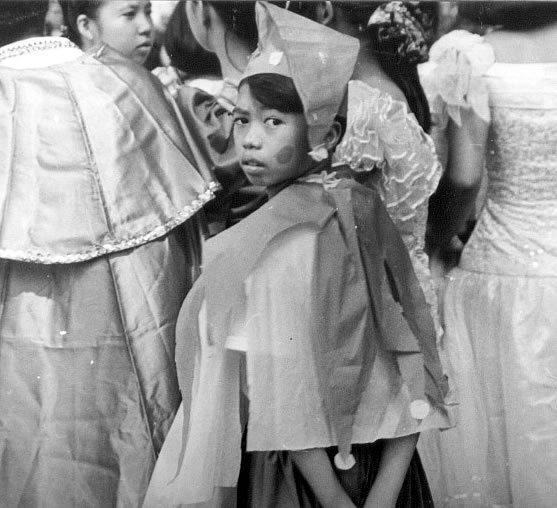
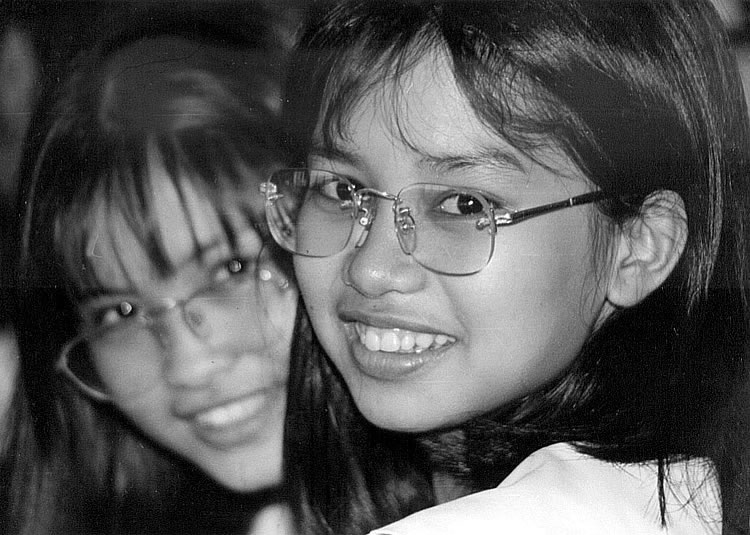
 Practical suggestions in shooting portraits
(1) When you’re shooting pictures of someone wearing glasses, focus on the eyes, not on the eyeglasses. Also, ask your subject to pull his/her chin a little bit downward so that the eyeglasses won’t have unwanted reflections, as in the picture above.

(2) Always play up your subject’s best features. The girl on the left in the picture below has very cute, very pronounced dimples, and so I took her picture from the side.
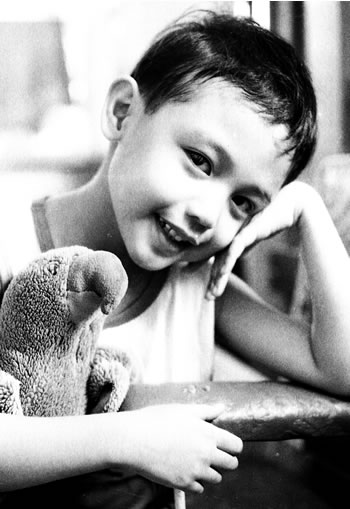
(3) Remember the picture below of my nephew JR? He’s cute, right? That’s because he looks like me! If you draw a diagonal line from the lower left hand corner up to the upper right hand corner, you’ll notice that the stuffed toy, JR’s eyes, nose and forehead all lie along that line. This line is known as the “picture diagonal,” and you should always strive to place the important elements of your photograph along this line. The picture diagonal, of course. may also extend from the lower right hand corner up to the upper left hand corner. (Please review the discussion on composition, specifically the topic on dynamic symmetry.)
 Portraits need not be of a single person only; there’s such a thing as group portrait, okay? You can liven up a portrait through the appropriate props.
(4) Use foreground and background blur
A blurred background or foreground is ideal for portraits since you would be “erasing” any distracting element, as in the two pictures below. Please review our lesson in foreground and background, ok?) If you are using however a point and shoot camera (whether film-based or digital) with a fixed focus lens, you cannot achieve this effect. You've got to use an SLR camera (whether film-based or digital) with a manual focus lens or with an autofocus lens that can be locked at a certain point or area of your image.

9 Photo Composition Tips (featuring Steve McCurry, 2002 Photographer of the Year, American Photo Magazine); Tip No. 7: Place the dominant eye in the center of the photo


