
Remember our discussion of lines? Lines may either be literal lines or imaginary lines of force and direction. Literal lines are like those on basketball floor or on the streets, while imaginary lines are like rows, the edges of objects, etc.
Lines also have psychological effects on viewers: horizontal lines evoke feelings of stability and serenity; vertical lines convey a sense of grandeur; and diagonal lines convey feelings of movement and dynamism.
Emphasis by leading lines
 One way of calling attention to your subject is to use “leading lines.” An example of leading lines is the picket fence behind the girl above making “hapet” with her math assignment. Leading lines, positioned either at the top or bottom portion of the picture, act like magnets pulling in the viewer’s attention towards your main subject.
Emphasis by diagonal lines
 A simple yet very powerful device in creating better pictures is the use of diagonal lines. In the picture, there are two diagonal lines on the ground, while the girls themselves (and the way their arms are positioned) also form diagonal lines. To create such lines, you have to shoot your subject from an oblique viewpoint (in simpler terms, shoot your subject from the side). To call more attention to your diagonal lines, anchor them at the corners of your photographs, like in the picture below of a little girl lost among the shadows.
 Emphasis by converging lines
 In the picture above, the edges of the covered walk really are parallel but they look like they’re converging towards the vanishing point at the left side of the picture. You will also notice a lot of diagonal lines in this picture (the pushcart, the building at the background area, etc).
Emphasis by converging lines and vanishing points
 Remember our discussion on perspective and vanishing points? Parallel lines can be made to converge at the so-called vanishing point, like in the picture above where the cement posts seem to become progressively smaller and smaller.
In the picture below, I purposely placed my Class ’91 yearbook staffers between the lines on the concrete floor and used a wide angle lens to create lines converging towards the top. Remember that objects located at or near the vanishing point receive greater emphasis than other objects in your picture. You can also cut off (“crop” is the technical term) the vanishing point from your picture in order to create a sense of mystery.

9 Photo Composition Tips (featuring Steve McCurry, 2002 Photographer of the Year, American Photo Magazine); Tip Nos. 2 and 3: leading lines, diagonal lines
Thursday, August 09, 2007
Photojournalism (18): Emphasis by lines: leading lines, diagonal lines, converging lines and vanishing points
Wednesday, August 08, 2007
God Of Wonders and Father's Love Letter
Tim Gibson created this Flash movie based on the song of the same title by Caedmon’s Call / Third Day. The movie takes about 45 seconds to load on a dial-up connection. Click the galaxy-like image at the lower right hand corner to begin. Despite some theologically objectionable graphics in this movie and my preference for traditional hymns, I hope this movie lifts up your spirit during this very rainy day!
Please also take time to view the "Father's Love Letter" at www.fathersloveletter.com/fllpreviewlarge.html. This is an eight minute preview of the 25-minute video created by Barry Adams and which has been viewed by millions. In this day and age of absentee fathers and dysfunctional families, you will learn from this Flash video of a different kind of a father.
Tuesday, August 07, 2007
Photojournalism (17): Picture formats
 A common mistake by beginning photographers is always shooting pictures in the horizontal format (that is, the length being longer than the height). But that’s understandable since that’s the way our eyes are set, on a line, beside each other, and not one eye on top of the other. If I remember my Psychology 1 class correctly, the way our eyes are positioned allows us to be able to judge distances and depth correctly. (I think it’s called visual disparity.)
General rules in choosing what format to use
When do we use the horizontal format and when do we use the vertical format? As a general rule, landscapes and group pictures should be shot in the horizontal format. Portraits should generally be shot in the vertical format. If you shoot a group picture with the vertical format, for example, it would mean stepping a bit far back to include the whole group. This means that the persons in the group shot will look smaller in the resulting image.
Shape of the object determines what format to use
The shape of the subject usually determines what format we should use, for example, vertically shaped objects like trees, buildings, etc. should be shot in the vertical format, as in the example below of the building (and the two students in the bottom portion contemplating their life after high school. Kapag tumibok ang puso!.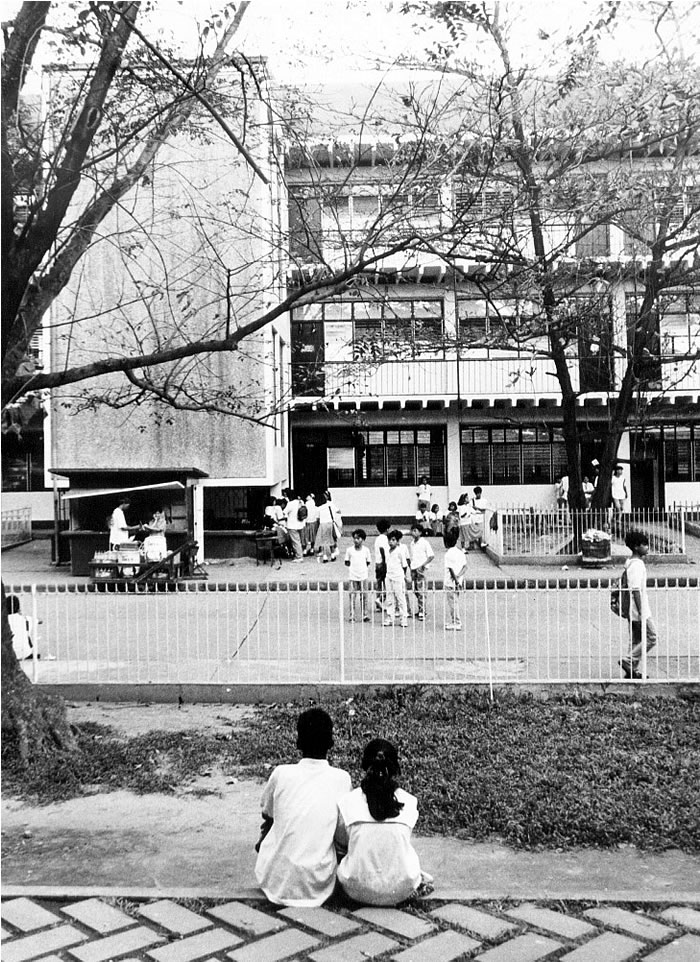 The vertical format however gives you a restricted view of things. If you want to show your subject’s surroundings therefore, you should use the horizontal format. (Later one, we will discuss what is known as “environmental portraits.” That’s a promise.)
 Picture formats and emotions
Remember our lesson on lines and their psychological effects on viewers? The format you use will depend on what emotion or mood you want to convey to your viewers. The horizontal format emphasizes horizontal lines which suggest harmony, stability, serenity. On the other hand, the vertical format suggests movement, dynamism and activity. In the picture above, we have both horizontal and vertical lines present.
Shoot several frames of a subject using both formats
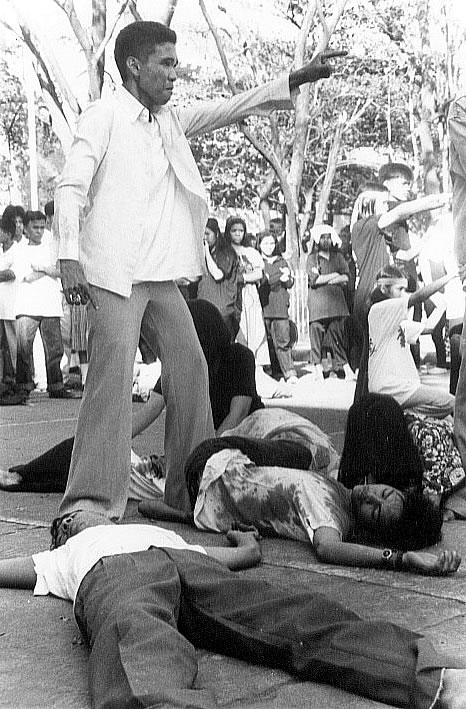
It is a good practice, however, to shoot your subject in both horizontal and vertical formats. (Remember that with a picture shot in the horizontal format, you can edit and crop it to produce a vertical format picture.) That’s not a real corpse in picture above, okay? The students were waiting for the start of the eliminations for the “Dekada 70” competition and we were having some fun with the coffin. The guy was trying to see if he could fit into the coffin. He did! I shot the picture vertically to concentrate attention on him and the other students watching him.
To familiarize you with the vertical format, here are several examples of pictures shot in that format.


Monday, August 06, 2007
Photojournalism (16): Choosing your viewpoint
 Take the shot from whatever vantage point you have
If you’re out on the streets or just walking around the campus, and something strikes your fancy, like a flash of color, a baby’s smile, a sense of belonging and warm friendship among a group of children as in the picture above, go for it! Take it! Take it! Take the shot from whatever vantage point you have or else you could lose the shot altogether. I was able to take only one shot of these children before they merrily dispersed into their separate ways.
If the situation allows it, however, you should take several other shots of that same subject, as shown by the pictures below.

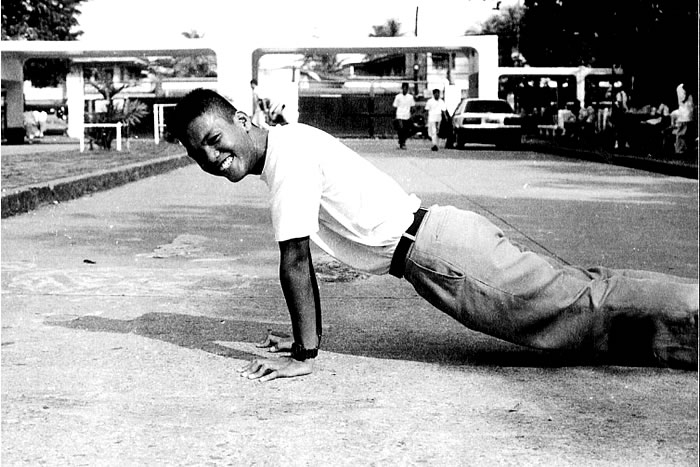 Walking around the campus one afternoon, I saw this guy on the ground, doing push-ups all by himself. I immediately took the first picture from where I was. But in the next picture, I came in much nearer and then shot a close-up of this guy who’s obviously enjoying punishing himself. (There’s a phrase describing the psychological condition of a person who enjoys inflicting pain on himself or herself. Let me see ... ah, yes, I think it’s called “falling in love.”)
Make each shot better than your previous shots
Your goal should always be to make each shot better than your previous shots. This means analyzing the subject, what made it visually appealing to you in the first place, deciding what lens to use (if you do have another lens, that is), what part of the subject to include or exclude, plus a number of other photographic techniques ...
The camera does not decide which viewpoint you should take
Apertures, shutter speeds, focusing - with automatic cameras today, you don’t have to fiddle around or bother with these things (which we will discuss in detail later on). The camera sets these things automatically for you. Some people call this derisively as “decision free photography.” What the camera cannot decide for you however is viewpoint, that is, where you position yourself in relation to your subject. The camera is a tool in your hand, and it goes where you take it and how you position it, to put things in a rather plain manner.
You have to choose of course what subject to shoot in the first place, what part of the subject to include or exclude, whether to move to the left or to the right, shoot from above, below or at eye level, whether to shoot close-ups, full shots, etc. Sometimes, shifting the position from where you shoot your subject can change the way the various elements of an image relate to one another. (Remember our previous discussion of elements of a photograph?) You can change the mood and impact of your pictures simply by changing your viewpoint. As Obi Wan Kenobi told Luke Skywalker in the movie The Return of the Jedi, “The truths we cling to are oftentimes the results of the points of view that we take.” Or taking a cue from savvy businessmen, we can say that the key to successful photography is location! location! location!

I took the picture above way back in February of 1992 when then President Corazon Aquino visited Rizal High School in Pasig, the largest high school in the world according to the Guinness Book of World Records. (Not anymore! For schoolyear 2006-2007, Rizal High only has 8,000 students. The annexes have already become independent high schools. Sic transit gloria mundi!)
Two weeks before her arrival, I guessed that she would have to use a helicopter to avoid the heavy traffic from Manila to Pasig. I picked out the spot where I could possibly take my shots, and for a week, I also deliberated on what film to use. I eventually decided to use Kodak Gold ISO 400. I set my beloved Canon AE-1 Program camera to shutter priority mode with 1/500 sec. as my speed and switched on my power winder. (P.S. Don’t let these technical terms and descriptions intimidate you, okay? You will learn all these things eventually.)
With this shutter speed, I was able to freeze the rotor blades of the helicopter. From the time the helicopter started descending, I was able to take some 18 frames. Notice that the helicopter is frozen in mid-air, just about ready to land, and it’s casting a shadow on the field. Notice also the guy on the lower left hand corner who’s running away. I caught him also frozen in mid-air, with both feet off the ground. And he’s also casting a shadow on the ground. Serendipity!
My point is, with some subjects you have the luxury of taking your time, planning your shots, and thinking about where you will position yourself. There are times however when you have to be on your toes, so to speak, and decide in a split second what viewpoint to use.
Most of the time, by practice, by instinct, we shoot our pictures at eye level angle. There’s nothing wrong of course, with shooting at eye level angle, but there are other points of view which can and do provide better images. Legendary film director/actor Orson Welles way back in the 1928 I think, introduced to movie making the various viewpoints – high angle, low angle, close-ups, extreme close-ups, etc) in his classic movie “Citizen Kane.”
Low angle point of view


A low angle point of view means that you and your camera are much lower in position than your subject. Why use this kind of rather difficult, strenuous position? Because, as Orson Welles in Citizen Kane showed, it imparts to your subjects a sense of power, of authority, of dominance. When shot from below, people, trees, buildings, etc. appear to be taller, bigger or more massive than they really are, dwarfing the photographer or the viewer. In the two pictures above, for example, we have a group of freshmen practicing for a choral interpretation contest and bowing before the two seniors training them.

 With a low viewpoint however, you should avoid two potential problems as illustrated by the pictures above. One, you could be shooting against the light. Two, your horizon line or other background elements can be uneven or skewed. (In the second example, I was almost lying on the ground when I shot the picture.)
High angle point of view


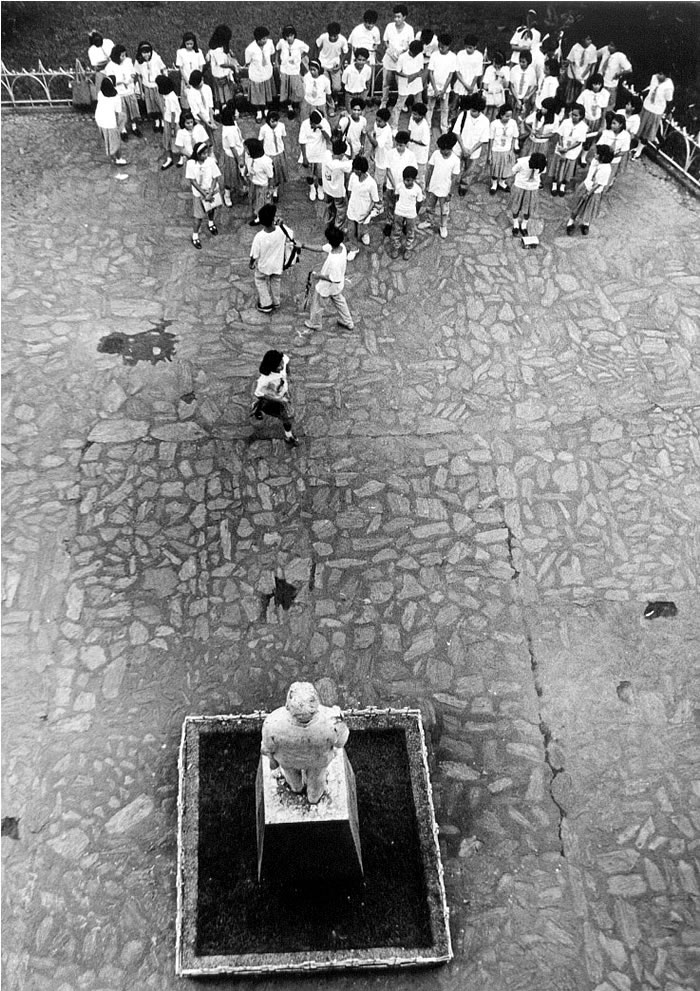
 A high angle point of view simply means that you are positioned higher than your subject. You could be on a higher floor of a building, standing on a chair or desk, etc. Your subjects appear to become smaller not only in physical size but also in psychological importance. A high angle POV also allows you to keep the background simple, to show a larger view of the subject, and to emphasize horizontal surfaces.
With the shot of the cadets doing a fancy drill above, I was on a tree, hanging on a branch with my left arm, while taking the shot with my right hand. I released my hold on the branch, focused my camera, took my shot and then grabbed hold again of the branch. Just kidding! Just kidding! Actually, I was on the third floor of a building where I took this shot.
(Notice the girl at the foreground, in the middle. Notice that she is out of cadence with the rest of her classmates. Remember that in fancy drills and playground demonstrations, there is usually someone who is out of cadence with the rest of the group. Look for that person and shoot him or her. With a camera, okay?)
Shoot from various viewpoints
After you have taken a shot from your initial vantage point, take other shots from other viewpoints. Photographers call this the “walkabout” which simply means looking for the best shots from your various positions in relation to your subject. Step to the left, to the right, move around your subject. Move nearer or farther away from your subject; if you have a zoom lens, zoom in and out on your subject.
 I shot the first picture above from a very high vantage point, that is, from the 3rd floor of a building actually. I waited until that girl was in the middle of the frame before I pressed the shutter release. I then took the next shot, this time from the side and from the 2nd floor.


 The first picture above doesn’t have a lot of impact because the viewer’s attention is divided among the four girls. (There are also some distractions in the background.) With the next picture, I shot only the girl holding the crucifix and the girl kneeling in front of her. I then took the third picture, zooming in only on the girl holding the crucifix. This close-up shot has a lot more dramatic impact; her upward, sideways look and painted face help create that impact.

 The first picture above, I shot these sophomores from a wide angle, thus, I was able to include the whole group and the guy lying on the floor. The next shot, I shot a close-up, zooming in on three of the students.


The two pictures above are sequence shots of a heinous crime about to be perpetrated right before dozens of giggling, laughing spectators. Just kidding! I shot the first from a slightly high angle by standing on a chair; almost everyone is in view. With the 2nd picture, I got off the chair, stepped to the right, moved in closer and got down on one knee to shoot from a low angle, to focus attention on the guy about to ... you know what!


