The Greek philosopher Aristotle, in describing human nature, once said: “Man is a political animal, gregarious by nature.” In simpler terms, he was saying that everyone wants to belong to or needs to belong to a group, to an association, to a club, or to a “berk” in today’s lingo.
In the picture above, we have a group of students practicing for a choral interpretation competition. I don’t know why, but these students and their costumes always make me think of a group of lemmings on the way to self-destruction.
Goal in shooting groups: convey the group’s sense of unity and belonging
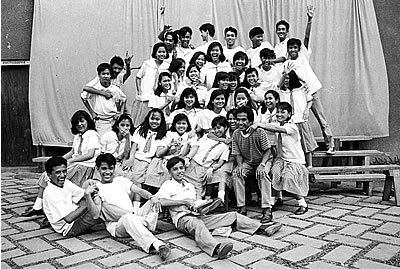
 When you’re shooting groups, your goal is to convey to your viewers the sense of unity and belonging (like in the picture above of a group of high school friends), and the collective identity of the group. This can be done in several ways:
(1) by choosing the appropriate setting or background;
(2) the use of props or uniforms, like the uniforms of the modern dancers below;
(3) by making the members feel relaxed and comfortable so that they’ll react naturally, spontaneously with one another like the girl scouts below.
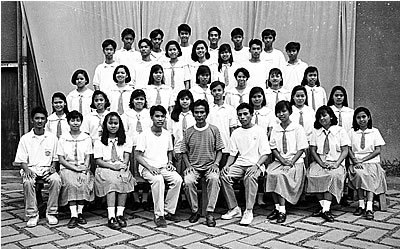
 Formal group shots: observe the group’s hierarchy
 Group shots can be formal or informal, serious or lighthearted. When positioning the members for a formal shot, you’ll oftentimes have to follow the group’s hierarchy - officers in the front rows (like in the picture above of the Rizal High School 1992 yearbook staff), the older family members in the middle ...
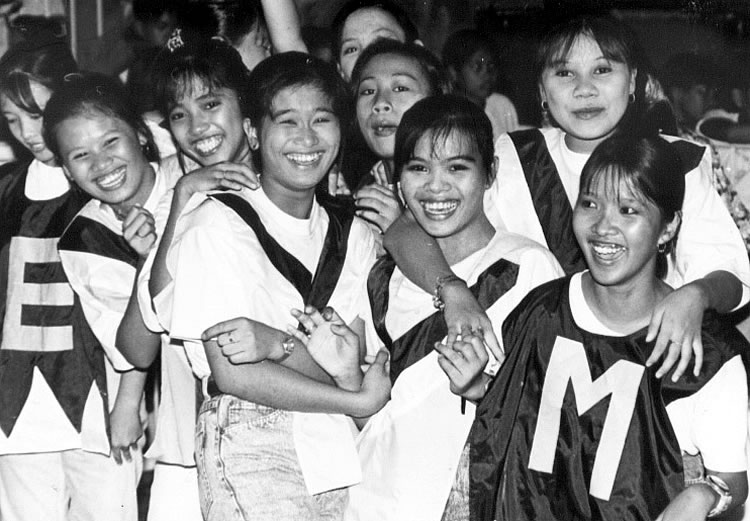
 Informal group shots: anything goes
For informal shots like the picture above, you should let the individuals choose whatever positions, gestures and expressions they want. You have to establish rapport with the group members; talk to them, humor them, capture their attention by whatever silly antics you can do ...
Remember our lesson in choosing your viewpoint? For group shots, you should use a high angle point of view so that everyone can be seen. Shoot several frames of the group since there will always be some people who are not ready, or with their eyes closed. By taking several shots, you can choose later on which picture contains the best facial expressions from the group members.
Focal point or center of interest; odd-numbered groups (Rule of Odds)
Compose your group shot in such a way it has a focal point or center of interest, like that girl in the middle of the front row of the very first picture in this post.
Keep in mind the “Rule of Odds” — it is easier to shoot an odd-numbered group rather than an even-numbered group. With an odd-numbered group, you can simply place one of the group members in the middle of the frame. You can then distribute the others to the left and right of that group member.
Triangular composition in shooting groups
You may also follow a triangular composition where you have several rows, with each row getting successively smaller. In the picture above, I got a triangular composition with the students forming the base and the head of Rizal’s statue being the apex of the triangle.
 Fill the frame
By whatever way you compose your group shot, make sure that you fill the frame, that there are no wasted spaces around your subject, like in the picture above of the modern dancers. Study the four corners of the subject before taking the shot. And always use a small aperture for a wide depth of field (more on this topic later).
If you’re shooting several rows, make sure that the rows are not too wide. Otherwise, you’ll have lots of empty, wasted spaces at the bottom and top portions of your picture. Remember, fill the frame with your subject! Study the four corners of your image before shooting.
How to shoot class pictures
 Here are the steps in shooting class pictures:
(1) Ask the students to line up according to height, smallest student in front.
(2) Position the class adviser in the middle of the first row. Place the president of the class and the vice-president to the right and to the left of the adviser.
(3) The other officers of the class should be distributed evenly according to height on either side of the adviser. The taller officers should be placed nearer the center while the smaller officers should be placed at the edges.
(4) The first row should be odd numbered with about a maximum of nine individuals comprising the row.
(5) The class muse and escort should be placed in the middle of the second row, immediately behind of the class adviser.
(6) Since the first row is odd numbered, the second row should be even numbered. Place the other students in between the students in the first row. Start with the smaller guys and girls. The idea is to place the taller members of the class in the last rows.
(7) Arrange your 3rd, 4th and 5th rows. Unless you have 70 to 80 students in a class, 4 to 5 rows will be enough. Stand back, look at the group. Make sure there are no unsightly gaps, and that everyone can be seen.
(8) Always bracket your shots. Take your pictures in a brisk manner because students easily lose interest (just like in math class!). After the formal shots, you can now have some fun with your informal shots, as in the picture below. Enjoy!