Saturday, November 17, 2007

Photojournalism (36): Through the lens

Free e-book:
Creative lens techniques
How to shoot images with impact

(21 pages; 7.28 MB)
Remember the simplest definition of a camera from our lesson “I Am A Camera”? It is merely a lightproof box that holds a lens at one end and film at the other end. Some photographers go to the extreme by saying that the lens is the most important part of a camera, with the camera body merely a box to hold the film. Like most extremes, however, this view is rather, well, extreme. It can’t be denied, however, that the quality of the lens determines to a large extent the quality of a photograph.

I remember one student in the 1980’s who quite innocently asked me, “Sir, does your camera have a lens?” Well, all cameras, whether digital or film-based, have lenses, except of course, when we’re talking about the pinhole camera (the “camera obscura” of ancient history). A lens is a transparent, optical device made up of glass or high tech plastic, and is capable of “refracting” or bending light.

Most of you, at this point in time, are probably using digital cameras. Your camera thus comes with a built-in lens that allows you to shoot groups or close-ups at the touch of a button. For those of you who are joining the photojournalism competitions in the various levels of the press conferences, you are still bound by the contest rules to use film-based cameras. For the grade school level of competitions, students are allowed to use 35 mm compact, point and shoot cameras. For the high school level, however, the participants are required to use single lens reflex cameras. As we discussed before in “I Am A Camera,” SLR cameras (unlike compact, point and shoot cameras) are distinguished by an interchangeable system of lenses.

Focal length of a lens


One of the most important considerations in buying or using a lens is its focal length, which is the distance, measured in millimeters, between the optical center of the lens and the film plane when the lens is focused at infinity. 

The focal length of a lens determines two things:

(1) the magnification of the image (how big or how small the image appears), and
(2) the field of view (how much of the scene will appear in the photograph).

Don’t fall into the fallacy, however, that the longer the lens, the better your photographs will be. I remember during the 50th anniversary of the National Secondary Schools Press Conference in 1993 held in Rizal High School in Pasig, a lot of the photojournalism participants were in awe with one NCR delegate whose camera had a long, long, long, long lens. They kept saying that this delegate was definitely going to win the contest. Well, he didn’t win any place at all.

Henri Cartiér Brésson is a revered name among photographers. His goal of capturing the “decisive moment” probably best sums up what photojournalism is all about. And by deliberate choice, what kind of lens did he use? What else but the 50 mm lens or the so called standard or normal lens, which is the lens you most probably have on your single lens reflex camera right now, right? Right!

Take note of the minimum focusing distance of your lens


A note of caution. All lenses (whether for digital or film-based cameras) have their “minimum focusing distance,” which is the limit as to how close a lens can focus. This is determined by the lens design and by how far the lens can be extended by its focusing ring. With 35 mm compacts (allowed in the grade school level press conferences), the lens generally is pre-set to render in focus subjects which are around 5 feet away from the camera up to infinity. If you try to shoot something which is below the minimum focusing distance, that subject will be out of focus.

Wikipedia has excellent, easy to understand articles on the different kinds of lenses, and on apertures and lens openings. Please browse these articles before proceeding with this lesson on lenses, okay?

Versatility of a zoom lens

I shot the following pictures using my beloved Canon AE-1 Program camera and my Vivitar f/3.5~5.6, 28-210 mm zoom lens. A zoom lens is two or three lenses rolled into one. With this zoom lens, I was able to shoot wide angle shots of groups, and telephoto (meaning, magnified) shots of faraway subjects.


With the pictures above, I used the 28 mm (wide angle) end of my zoom lens. Without having to move back, I was able to include almost the whole athletic oval where hundreds of students were performing for the Field Demonstration. Now take a look at the next picture.

I then zoomed in on the students at the center of the athletic oval, using the 210 mm (telephoto end) of my zoom lens. I didn’t move from the position I was in when I took the 2nd wide angle shot above, but my zoom lens allowed me to shoot a close-up of the group of students performing in the middle of the oval.

The pictures below illustrate the versatility of a zoom lens, that is, from wide angle shots, I was able to shoot close-ups of my subjects.


Telephoto lenses compress linear perspective

(Note: To be technically accurate about it, it is not the focal length of the lens but the camera-to-subject distance that produces the compressed or stacked perspective.)

Telephoto lenses appear to compress linear perspective, that is, background details seem to move toward you, and objects that in reality are far apart look or appear much closer than they really are. If you watch any sports event, for example, on television, the spectators in the background look deceivingly much closer to the players in the foreground. This effect is known as “stacked perspective”, “compressed” perspective or “squashed” perspective.
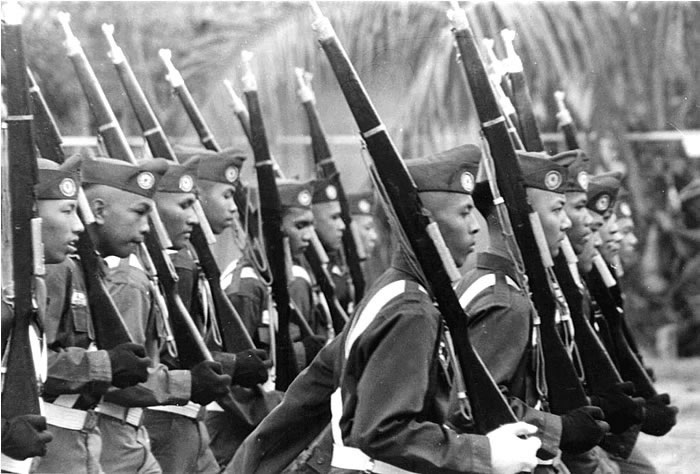

Take the picture above of the marching cadets, for example. We all know how wide a platoon is, with nine cadets (or elements) in each squad. Notice, however, that the cadets seem so close to each other, like they were squashed together in a single shallow plane. Like I said, this effect is known as “compressed perspective” among other names. (Pssst, guys, check your alignment!)


The picture above is another example of compressed perspective. An airplane seems just about to crash towards the church tower. (Memories of 911!) The plane and tower are really far apart, but the telephoto end of my zoom lens produced this compressed perspective.

Wide angle lenses, distortion, and the keystoning effect


When you want a great depth of field, that is, everything in the picture must be recorded sharply, from foreground to deep background, you have to use a wide angle lens. Pictures shot with a wide angle lens have a strong sense of depth and distance.

On the other hand, the most significant disadvantage of wide angle lenses is distortion. If there are circular objects at the corners of the frame, they become distorted, taking on oval shapes. If you’re shooting crowd scenes for example, heads of persons near the frame corners will become distorted. Wide angle lenses are thus not suited for close up portraits.

Also, if you tilt the camera even a little upward, parallel vertical lines of the subject (like those of the building above) will converge towards the top or bottom of the picture. This is the so-called “keystoning” effect.

Trivia on lenses


1. Bill Foley won the 1983 Pulitzer Prize, the most prestigious prize in journalism, for his photo coverage of the Sabra and Shattila massacres in Lebanon where Christian militiamen murdered Palestinian civilians in these two refugee camps.

One time, Foley and Time photographer Bill Pierce were picked up at a checkpoint manned by Syrian soldiers who suspected them of being spies for the Israeli army which had invaded Lebanon. They were detained and beaten up.

Foley had a handheld light meter which naturally had the various f-numbers/apertures indicated on its exterior. One of the Syrian soldiers manning the checkpoint was convinced that the “f/16” marking on Foley’s meter was a means for communicating with Israeli F-16 fighter jets!

2. Distortions and converging lines created by wide angle lenses are generally treated as liabilities but as you master the basics of photography, you will learn to use these liabilities creatively in order to come up with better pictures.

3. So you’re stuck with your dinky standard lens, with no money to buy those monster zoom or telephoto lenses you see professional photographers carry around ... You wonder how in the world you can ever improve your skills without those long lenses. Well, what lens did Hénri Cartiér Brésson or Eduard Masferré (a Belgian photographer whose pictures of the Ifugaos and other mountain tribesmen may be considered as national treasures) use? What else but the very same dinky standard lens you have!

4. “Perfect Strangers” was a very popular television sitcom in the 1980’s and early 1990’s. The show told the stories of Balki, an innocent, naive immigrant to the US and his cousin Larry, a struggling photojournalist who never seemed to run out of troubles primarily because of his insecurities, get rich quick schemes and his bloated ego.

But Balki would always come to Larry’s rescue, and Larry would always see the error of his ways. While we felt good about Balki’s innocence, we also readily identified with Larry’s insecurities, his foibles and his failures.

In one episode, Balki and Larry went to a photo exhibit by a renowned photographer. Larry wanted to meet the photographer whom he thought could help him in his career as a photojournalist but the highbrow hosts of the exhibit didn’t give him the chance.

Depressed, Larry began criticizing the photographs, especially that of a solitary man along a highway. Larry said that the photographer should have used a 24 mm wide angle lens instead of a 28 mm lens. Or was it a 20 mm lens instead of a 24 mm? Anyway, the host of the exhibit who overheard these remarks promptly and publicly scolded Larry for daring to criticize the photograph.

While Larry was stammering his way towards an explanation, the world famous photographer asked him why a 24 mm lens should have been used. Larry answered, quite correctly as the photographer would later on say, that a 24 mm lens would dramatically “increase the photograph’s sense of isolation.”

Just for once, Larry was right, and we all felt, I’m sure, really, really good about Larry’s vindication.

Thursday, November 08, 2007

Photojournalism (35): How to write photo captions; Campus news photography and working on your yearbook

Update as of September 18, 2023:

If you’re a high school or grade school student in the Philippines who’s joining the photojournalism contest in the division, regional, or national press conference, I’m offering two free resources to you :

A. 900-plus interactive exercises on English grammar, vocabulary, reading comprehension, verbal analogy, etc (with around 200 megabytes total file size). The exercises have time limit and automatic scoring, with an average of 10 items per exercise.

Examples of these interactive exercises are: Common English grammar errors: Exercise 01 (nouns - confusions of number); Phrasal Verbs: Expressions with Go; English Placement Test (45 items).

B. 200-plus resources (JPG, PDF, MP4, etc.) on photography and photojournalism, with 600-plus megabytes total file size. For some examples of these resources, surf to the “Free photography e-books, cheat sheets” page.

For the download links and more information about how to use the interactive exercises, please surf to my “Better English resources and exercises” blog. Please inform your journalism teacher/schoolpaper adviser or your parents about these resources before downloading them.

If you have any question about downloading or using these free resources, please email me (after informing your journalism teacher/schoolpaper adviser or your parents). I’ll be able to reply to you within two to three days; if you don’t see my reply in your Inbox, check your Spam folder. Or, you can text me.

Atty. Gerry T. Galacio
gtgalacio@yahoo.com
0927-798-3138


How to write photo captions


Captioning (in English or Filipino) is a part of the photojournalism competitions in the district, division, regional, and national press conferences. Posted below are three videos that explain how to write captions; the 2nd video is the most comprehensive, with its guidelines essentially repeated in the 3rd video. (Note, however, that in professional newspaper work, a photojournalist may either write the draft caption or simply provide the 5Ws and 1H, but the final caption is written by the desk editor.)


Other YouTube videos on captioning: Journalism Style Guide: Caption Basics; Writing Captions; Caption Writing Examples and Exercises; Captioning (Photojournalism)

PDF resources on captioning: ABCs of Caption Writing - Yearbook Besties; 1Y - Yearbook Caption Writing (24 points possible); Caption writing - La Salle University; Writing Great Captions - Canyon yearbook; Creating Captivating Captions (from online discussion/flip book)

Articles on captioning: How to write a good photo caption; How to Write and Use Photo Captions; How to Write Good Captions in Photojournalism; How to write a caption (with audio); How to Write Captions for Your Photos

Campus news photography and working on your yearbook


“High school, the best years of our lives, except for the days spent in math class!”
Just kidding, okay? Lighten up! I hope math nerds or math lovers among you out there won’t take offense over all these things I’ve said about math. But I must admit I’m not really good with numbers; I’m probably better at cross-stitching than at algebra ... Just kidding, okay? Lighten up! Actually, math and other related disciplines can be a lot of fun.

As I explained in the introduction to this series on photojournalism, I’ve used the term “photojournalism” in a rather loose but restricted way. Loose because photojournalism is the application of photography to a class of events people would classify as news (the topics we have discussed however are the basics, the foundations of photography). Restricted in the sense that I have limited the term to “campus news photography.”

Campus news events: hard news and soft news

In practical terms, the following may be considered as campus news events:
  • programs
  • stage presentations
  • speech festivals
  • graduation
  • PTA meetings
  • awarding ceremonies
  • club elections
  • academic contests
  • practices
  • demo classes
  • intramurals
  • alumni homecomings
  • classroom events
  • book presentations
  • community outreach activities.
These may constitute what we can call “hard news,” while things like students relaxing in the library or teachers taking a break may be classified as “soft news.”

Classroom dramas

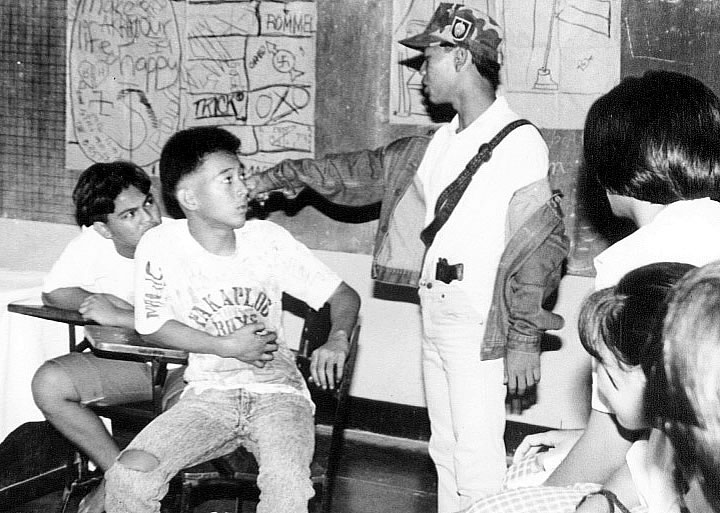
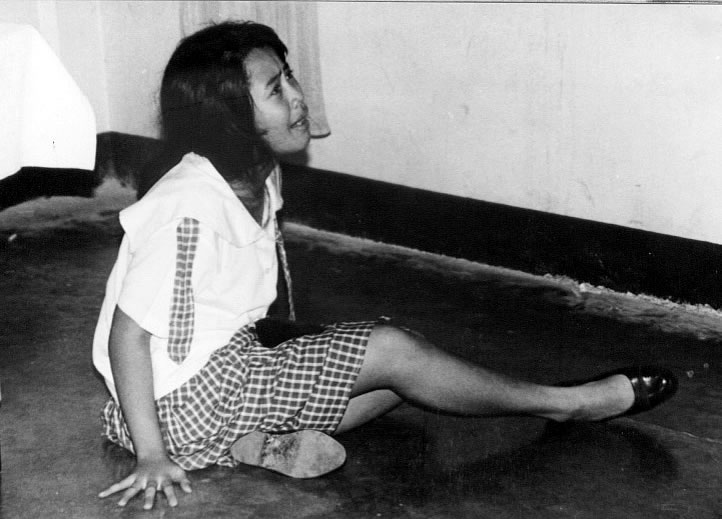
An often neglected aspect of campus news photography is classroom dramas. That’s understandable because the schoolpaper photographers have their own classes to attend. But, as the examples below show, classroom dramas provide a rich source of pictures not only for your schoolpaper but, more importantly, for your yearbook.


Watch the practices or rehearsals

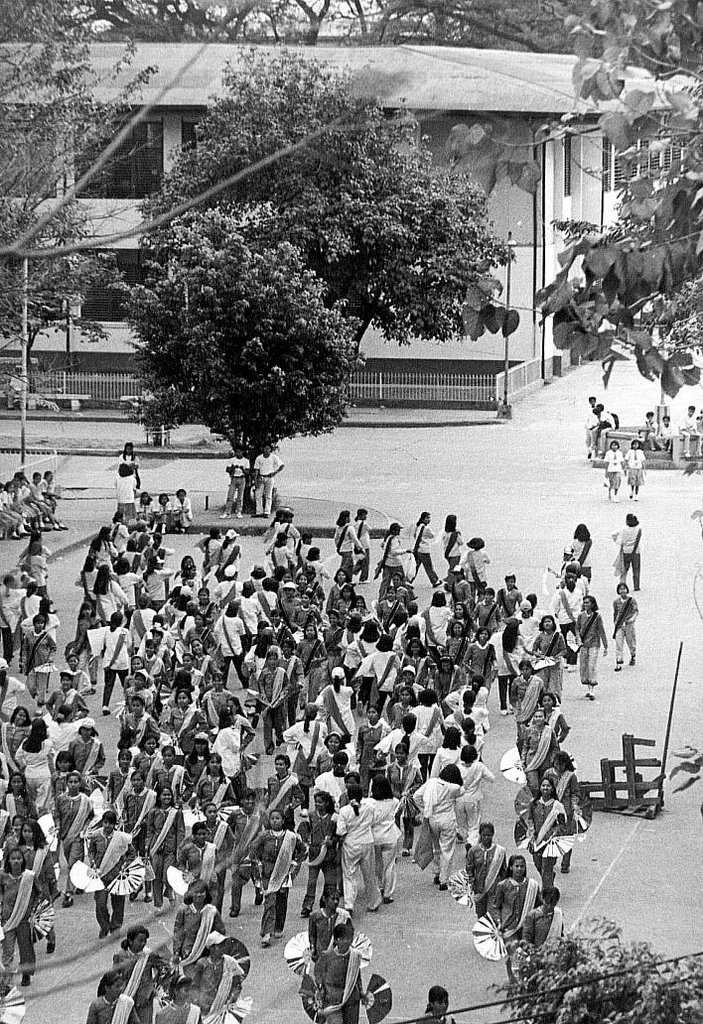
I have emphasized several times in this series the importance of watching the practices or rehearsals for any activity. If you don’t watch the practices for choral recitation contests or field demonstrations, for example, you won’t know which action, which formation would be good to shoot. You’ll be caught unprepared, and the most “photogenic” moments or actions could zip by you in seconds.

 
When you’re taking candid shots of your fellow students around the school campus, you’ll find it difficult at first in getting natural looking, candid reactions (like those of the shy sweethearts in the picture above). Your fellow students will naturally be conscious of you and your camera. But as time passes by, your schoolmates (like the CAT cadets below) will get used to you and your camera, and they won’t mind having their pictures taken. This way, you’ll get more relaxed, more natural looking expressions and reactions.


Archive your photos

Update as of March 15, 2020:

You can use the various free cloud services like Google Drive or Dropbox to archive your photos.
Your schoolpaper staff should also make it a regular practice to keep all the negatives, all the pictures taken from year to year. If you’re into digital photography, burn the images onto CDs. If you don’t, pretty soon, your hard disk will become full of images, and the tendency is to erase some images to free up some disk space.

These pictures (or image files) will constitute your stock photos. If you need a picture as filler for a certain article in your schoolpaper, you can just pick an appropriate picture from your stock. If you can’t watch a practice or rehearsal, you can review your stock photos. This will also help you in deciding how to vary your coverage of an event or program.

Provide the context for your photo coverage

In covering any event, don’t just concentrate on the actual event. Shoot the practices, the preparation of the props, the participants on their way to the venue, etc.
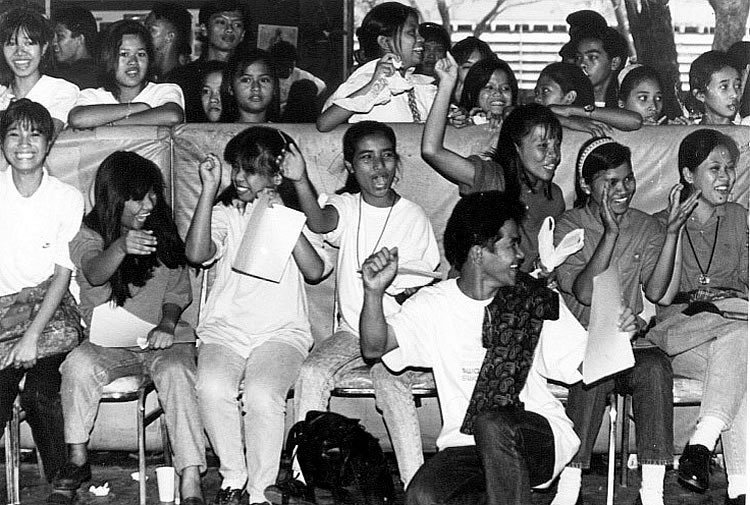
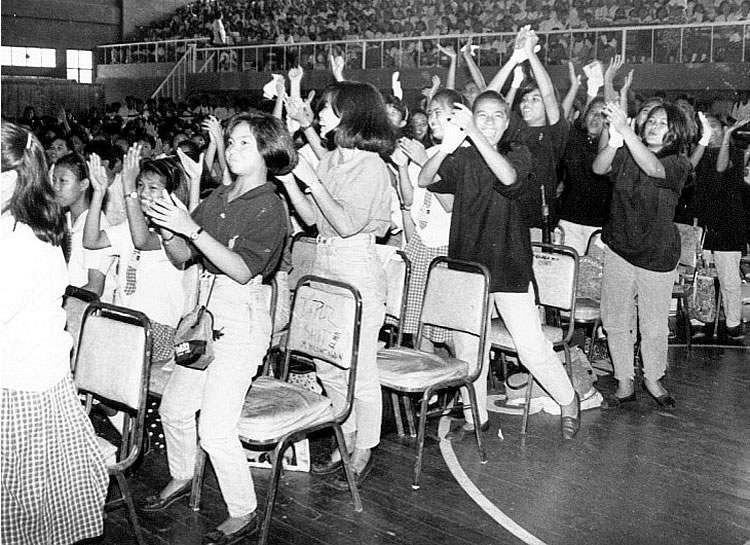
When the winners are announced, turn around immediately to shoot the reaction of the audience or spectators (like in the pictures below). Shoot the jubilant winners, shoot especially the sore losers.


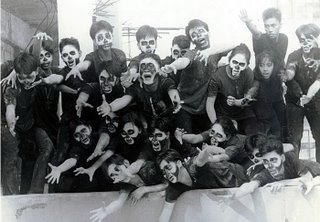
In covering events, be aware also of the various photo opportunities provided by the spectators, like these two girls (below) wearing masks and watching from the sidelines.


Working on your yearbook

The most tangible souvenir of your high school or college days is the yearbook, and you should therefore exert all efforts to make it really memorable. The sad fact, however, is that, for most schools, the yearbook is a tradition-bound publication. Don’t get me wrong, there’s nothing wrong with a lot of traditions. But you’ve got to admit, there isn’t much difference with the yearbooks your school publishes from year to year. Once you’ve seen one yearbook, you’ve seen them all.

Of course, some things you expect to see in any yearbook — individual pictures for private schools, class pictures for public schools, messages, directories, etc. But the challenge is to produce a yearbook that contains not only all the “traditional” materials but also new materials and new designs that will make your yearbook stand out from the rest.

Coming up with a better yearbook requires, first of all, a rethinking about what it should be. Traditionally, a yearbook is meant only to contain pictures of the graduates and not much else. My idea is that a yearbook should be a summation of your whole stay in high school or college. A yearbook therefore should not only have lots of good pictures to look at but also a lot of good articles to read. In practical terms, this would mean including pictures of all school activities and candid pictures from first year to fourth year, poems, feature articles, interviews with outstanding class personalities, etc.


Conceptual approach to campus publications


As I told you in the introduction to this series on photojournalism, I worked as journalism teacher and schoolpaper adviser in Quezon City Science High School in 1983-84 and in Rizal High School from 1984 up to 1996. The picture above shows some of the yearbooks I edited for Rizal High School. With all these yearbooks, I have always followed what I have called the “conceptual approach” to publications. By this I mean, a certain theme, idea or concept determines the overall design and layout, the pictures and articles to be placed in the yearbook. For example, for the 1990 yearbook I worked on, the concept was “Roots” and by this I meant, what’s the root, the source of being or identity for the student? The family, the group of friends ... What’s the root of the family? The community, the country ... In practical terms, I included pictures of the parents and siblings of the valedictorian and salutatorian. There were also interviews and pictures of the wholesome “barkadas” among the graduates. Pictures of the community were included as fillers.

In l993, I came up with “A Sense of History” as the concept. Pictures of our school and students from the 1920s up to the l940s were included in the yearbook. The list of the valedictorians and salutatorians from previous years were included on the pages allotted for that year’s top honor students. A special feature was that of a member of Class ’73 (that’s me!) looking back in nostalgia, 20 years after high school. Other concepts ? “A Brave New World” (1992), “The Circle of Life” (1995), and “Individuality” (1996).

A lot of schools follow what I call the “shotgun” or “scattershot” approach. They simply bundle or mix and match all the pictures and articles in a certain publication without coming up first with a single controlling theme or concept. Why use the word “shotgun,” you might ask?

Well, if you use a shotgun, it scatters pellets all over the target. There isn’t a single hole but a lot of holes. Meaning, publications which follow the “shotgun” approach lack unity, emphasis, or, as Edgar Allan Poe described it, a “single dominant impression” that sticks in the minds of the readers.

My point is, you and your fellow staffers should bump heads together to come up with a theme or concept that would control the articles and the design of your yearbook.

The concept, however, is not meant to be a straitjacket to completely stifle your creativity. Even if a certain picture or article does not completely fit with the concept, you may still use it. As long as there’s some relevance, use it!


Practical suggestions for your yearbook

Besides coming up with a concept before beginning to work on your yearbook, here are some practical suggestions I’d like to pass on to you.

1. Don’t use fancy borders for your yearbook portraits. Some people think that the fancier the borders they use, the better their yearbooks would be. Ehh! Totally wrong! Fancy borders take attention away from the portraits. Use simple line borders or drop shadows. Avoid oval shaped portraits; they’re simply outdated.

2. For schools which use class pictures instead of individual pictures, avoid having wide rows. If they’re too wide, you’ll have lots of empty, wasted spaces at the top and /or bottom portions. Remember our discussion on shooting groups and the steps in shooting class pictures? Remember filling the frame?

3. A lot of private schools love cutting up and grouping pictures of activities into shapes like hearts, birds or some other fancy shapes. What can I say without being unkind? These designs are amateurish; furthermore, these fancy shapes take attention away from the pictures which should stand on their own.

4. Here’s something I really, really hate to see in a yearbook or any publication. Some staffers or advisers love using lots of fonts in a single page or in one whole publication. Sometimes, there will be 3 to 5 fonts in a page - Banff for the headline, Times Roman for the text, Casper Open Face for the subheads ... These people believe that the more fonts they use on a page, the better looking their publication would be. Ehh! Absolutely wrong!

Read books on page layouts or typographic designs and they’ll tell you, simply use one or two fonts per page or publication. What I usually do in terms of headlines is this: Poster Bodoni (or any other selected font) all throughout the publication but with certain variations (italics, all caps, caps and lower case, fit text to path, outlines or drop shadows). In this way, I can get variety and unity at the same time.

5. How long does it take to do a yearbook? If materials are complete, 45 to 60 days would be more than enough for the printing press to finish it. But you and your fellow staffers have to go to press almost every day. Some private schools get their yearbooks several months or even years after graduation because they just leave all the work with the press, which takes its own sweet time doing the work. It’s your yearbook, work on it!

Thursday, November 01, 2007

Photojournalism (34): Using your flash

This is my beloved Canon AE-1 Program camera which I bought way back in 1985; except for the flash synchro, it's still working despite the years and after I used it to shoot more than ten thousand pictures; the flash is Vivitar 2800 model I think, the lens is a Vivitar 28-210 mm zoom lens, while the power winder is generic. Without light, photography is not possible

Remember what the poet Francis Bourdillon said? “The night has a thousand eyes and the day but one. Yet the light of the whole world dies when the day is done.”
I don’t know if Bourdillon ever tried photography, but these lines underscore our heavy reliance on the sun, on sunlight, in order for us to take pictures. Remember that without light, photography is not possible. There are instances, however, when we have to use artificial light sources in order to take pictures, like when we’re shooting indoors, in overcast sky, early morning, late afternoon, evening ...

http://www.digitalcameraworld.com/tag/photography-cheat-sheet/

Free PDF resources on fill flash

Flash Part 2: Fill Flash by Stephenson and Whittle

Sony lighting guide (fill flash discussion on p. 10)

Fill Flash by Mark Greenland

Daylight Fill in Flash by Rick Sammon

Fill Flash cheat sheet
Electronic flash

The most common form of artificial lighting for photography (whether digital or film-based) is electronic flash
. An electronic flash has a glass tube filled with a rare gas called Xenon (atomic number 54, atomic weight 131.30; the sole source is the atmosphere which constitutes 1 part in 20 million). The flash is powered by a battery-fed capacitor. When you switch your flash on, you’ll hear the high pitched sound of the capacitor turning battery power into AC (alternating current).

After storing energy, the capacitor releases it to the tube to create the flash of light whose duration is often faster than 1/1000 of a second. This is actually your effective shutter speed. We will study shutter speeds later on; for now, if you’re using a manual SLR camera, you have to set your shutter speed dial to your “x-synch” which may be 1/60, 1/90/ 1/125 or 1/250 sec. The “x-synch” is the speed you have to set when using your flash. This speed is sometimes marked on your shutter speed dial by a lightning bolt symbol. In some camera models, this number (a fraction actually) is marked by a different color.

If you’re using an automatic, point and shoot camera (whether digital or film-based), you don’t have anything to worry about. The camera will do everything for you, except buy pizza for you …

Problems when using flash

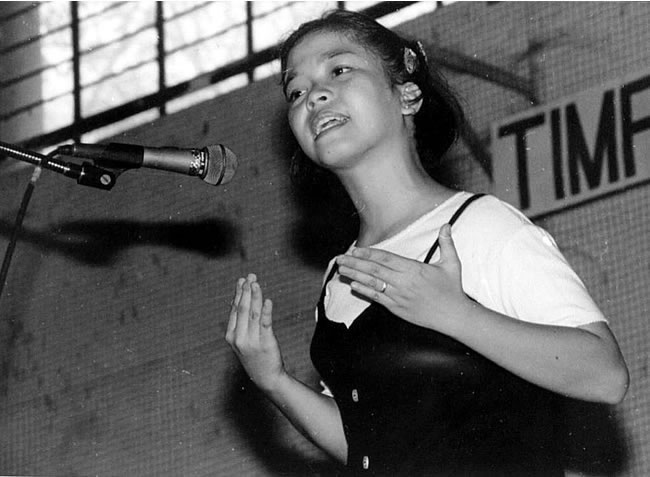
Flash usually creates harsh shadows behind your subject, destroying the mood of the picture; Rizal High school, 1996, photo by Atty. Galacio
By changing my viewpoint, I got a darker toned background that absorbed the shadows; Rizal High School 199; photo by Atty. Galacio1. Harsh shadows

Perhaps the most negative aspect of using flash is the harsh shadows created behind your subjects, like in picture above where the shadows of Gracie (my student in Rizal High School in the 1990’s) and the microphone are clearly visible on the background. These shadows oftentimes destroy the mood of a picture.

Solutions? One, you can choose a different viewpoint like what I did in the 2nd picture above. By moving to the left, I got a darker toned background that absorbed the shadows. Two, you can adopt a high point of view. In this situation, the shadows will be hidden behind your subject. Three, if you can afford it, buy a ring flash; this flash creates no shadows.

2. Foreground object casts shadows on the subject

Foreground object creates or casts shadows on your subject; photo by Atty. Galacio
This is the classic booboo when using flash. A foreground object (in the picture above, the student on the left hand side) receives too much light, and casts shadows on the main subject, the guys in the background. Solution? Fill the frame with your subject and choose your viewpoint carefully.

3. Automatic flash can be fooled or thrown off by the overall brightness of the scene

Flash is often fooled when your subject is surrounded by light toned elements; photo by Atty. Galacio
When your subject has light toned surroundings or elements, like in the picture above where the shy student says “Hello!” from behind some graduation togas, your automatic flash can be fooled or thrown off by the overall brightness of the scene. The result? Your subject comes out underexposed or too dark, while the surroundings turn out properly exposed. Solution? Set your flash on manual, measure the distance between you and the subject, and then set the appropriate aperture.

4. Flash fall-off

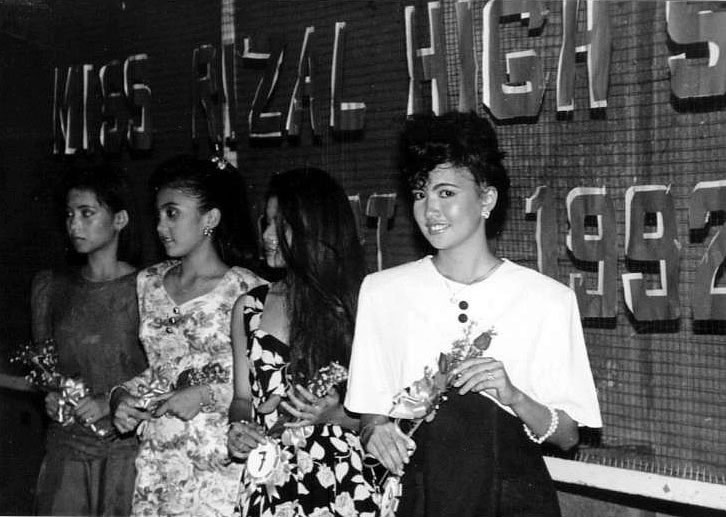
Flash fall off; inverse square law; use the proper viewpoint; Rizal High School 1992; photo by Atty. Galacio 
When subjects are located at different distances from the camera, they won’t receive the same amount of illumination from your flash.
In the picture above, the girl on the extreme right (Miss Rizal High 1992), in the foreground, gets the right amount of light. The girl on the extreme left (Miss Freshman 1992), on the left hand side, is farthest from the camera, so she receives a lesser amount of light and thus her image turns out darker. The technical reason for flash fall off is the so-called “inverse square law” but hey, I don’t want to bore you with another math-related topic! Just make sure your subjects are located at the same distance from the camera by choosing the right viewpoint, okay?

Hot spots; photo by Atty. Galacio 5. Hot spots

When your subject’s background or any element in the subject is a reflective, polished surface like mirrors, glass doors, chrome finished exteriors, etc. your flash will create harsh reflections known as hot spots,
like in the picture above of the student playing the role of the Tin Man from “Alice in Wonderland.” One solution can be to choose the right viewpoint so as to possibly minimize the size of the hot spot. While generally regarded as liabilities, hot spots however may be used creatively.

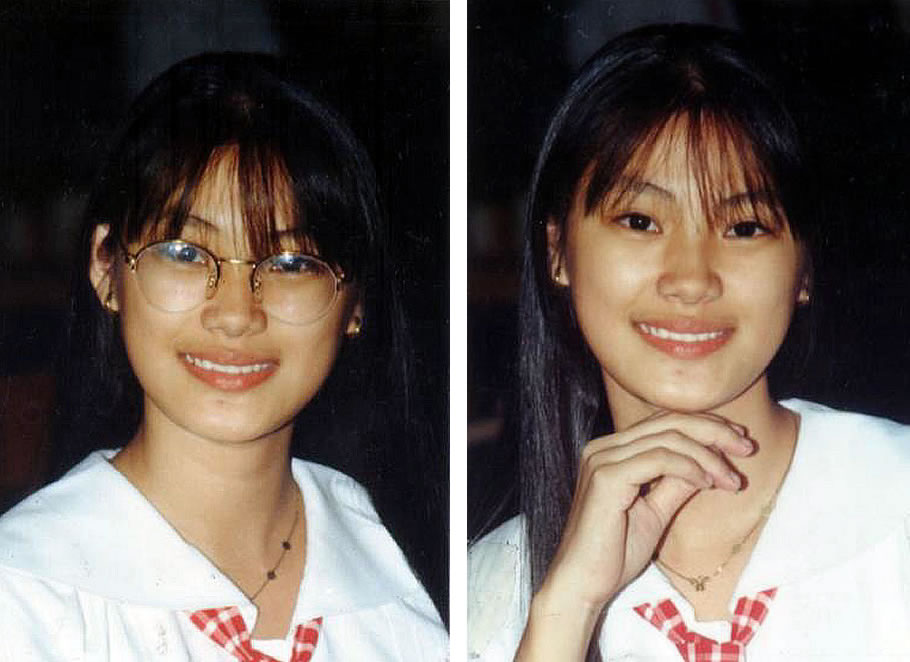
The hot spots are in the eyeglasses; photo by Atty. Galacio
In the pictures above, the hot spots are in my student’s eyeglasses. In the right hand picture, I got a better portrait without the eyeglasses and without the hot spots. (Remember our lesson in shooting portraits? When shooting your subject’s face with one or both of her hands included in the picture, don’t show the back of the hand. Position the hand so that only the side is shown, as in the right hand picture above shows. This creates a slimmer line, unlike when the back of the hand is shown.)
 

6. The problem of red eye

“Red eye” occurs when the flash is located too near the lens. Red circular spots are created in the pupils of your subject’s eyes. Most 35 mm compact cameras (whether digital or film-based) have flash that’s designed to reduce red eye. If your camera flash doesn’t have this red-eye reduction feature, ask your subject to look closely at lamps or light bulbs before you take the shots. Also, you can use pentel pens to “retouch” your pictures or erase the red eyes. As you can see by now, red eye isn’t a problem if you’re using black and white film (please refer to our previous lesson on shooting color or black and white).

7. Creating a gentler, kinder light

You can create a kinder, gentler light falling on your subject by bouncing the flash off a low, gray or white colored ceiling. Or you can do it the way professionals do it. You can attach a white index card to your flash, fold it and bounce your flash off that card. If you’re using a manual flash, you have to open up your lens by one or two stops (more on this topic later on, okay?). If you’re using an automatic or dedicated flash, there’s no need to adjust your aperture.

Never use a shutter speed faster than your x-synch


DSLR cameras have “high speed synch” that allows the use of flash at any shutter speed.
If you’re using a film-based manual SLR, never use a shutter speed faster than your x-synch! If you do, half of the frame will be totally dark, devoid of any image. But you can use a speed slower than the x-synch if you need more illumination for your subject. Some camera models (like the classic Olympus OM-4, and those cameras employing leaf shutters) offer what is known as “perfect synch” which means that you can use your flash at any shutter speed.

The burst of light produced by the flash is similar in color with daylight. Electronic flash is “balanced” to give the same quality of light as the average noon daylight which measures about 5400 Kelvins in the color temperature scale.


Setting up a hot shoe mounted flash

Besides the built-in flash, the flash unit you’re probably most familiar with is the one where you have to place it on top of the camera’s pentaprism, inserting it into what is known as the hot shoe, and depending on the model, locking it into place. The picture above of my beloved Canon AE-1 camera shows this kind of a flash unit.
1. Install the batteries, observing the correct positive/negative placements. Batteries may either be conventional batteries or rechargeable nickel-cadmium (Nicad) batteries. You can save money using Nicads but take care charging these batteries. You’ll notice that flash with ordinary batteries take longer to recycle as the batteries lose their power; Nicads always have a constant recycling time, up to the time they totally lose power.

2. Switch the flash unit on; if the batteries are installed properly, you’ll hear a high pitched sound created by the oscillator turning DC power to AC. The sound is cut off when the ready light goes on. To be sure that the flash is working properly, press the test button.

3. If you haven’t done so yet, slide the flash unit into your camera’s flash accessory shoe (“hot shoe”). Some units have a lock on screw which prevents the flash from falling off. Depending on the model, the flash has one or more contact points which connect to the camera’s flash circuitry. Other flash units need to be connected through a cord to the camera’s PC or co-axial socket.
Manual flash exposure

We will be talking about exposure or setting the correct shutter speed and lens opening combination in detail later on, okay?
1. The flash unit has an ISO scale; set it according to the film’s ISO rating (unless of course, if you’re pushing or pulling your film). Set your shutter speed dial to the x-synch.

With the advent of digital photography, most amateur photographers no longer have to learn or deal with ISO ratings. ISO stands for International Standards Organization and films are classified as ISO 100, 200 or 400 and so on. The higher the ISO rating, the more sensitive it is to light. ISO 100 film is the ordinary kind of film that’s given to you at the store if you don’t specify what kind of film you want. Before I started using a borrowed digital camera, I preferred using Kodak Max (an ISO 400 film).

With digital cameras, you can also adjust the camera to an ISO 400 rating. This means that you can take pictures even in low light situations even without using your flash. The downside however (I stand to be corrected on this, okay?) is that each picture will take up more memory and you will have lesser number of shots available.

2. Focus on your subject, and then read the distance between you and the subject as indicated on the distance scale of the lens. The scale is calibrated both for meters and feet; use whatever measuring system you’re most comfortable with.

3. On the flash unit’s exposure calculator, locate the flash to subject distance which you determined in Step 2. Opposite or below that number is the correct f/stop or lens opening to use. Set the aperture ring of your lens to this f-stop. Notice that on the exposure calculator, as the subject becomes progressively farther away from the camera, the larger the aperture or lens opening becomes. We will learn more about f/stops or lens openings later on, okay?

http://media.digitalcameraworld.com/wp-content/uploads/sites/123/2012/11/Flash_guide_number_cheat_sheet_2.jpgUsing the guide number to determine what lens opening to use

Instead of using the exposure calculator of the flash, you can also determine which f-stop to use through the flash unit’s guide number. The guide number is a measurement either in feet or meters of the flash unit’s power, as provided by the flash manufacturer. There is a different guide number for each film speed but generally, guide numbers are provided for ISO 100 film.

How do you know what’s the GN for your flash? Look for it in the instruction guide, or simply set your flash to ISO 100. Multiply any distance with the corresponding aperture and you’ll get the guide number. Remember that the higher the guide number, the more powerful the flash is (the more expensive the flash unit is too). The classic Vivitar 283 flash, a favorite among professional photographers even today, has a guide number of 120 feet.

How do you use the guide number? Divide the flash-to-subject distance into the GN and the result is the correct f-stop to use. For example, with a guide number of 16, the correct f-stop to use is f/8 if the flash-to-subject distance is 2 meters. Why? 16 divided by 2 equals 8, right? I knew that! Hey, I checked my calculator, and it gives the same result!

Automatic flash


With manual flash units, you have to change the aperture setting on the lens every time the flash-to-subject distance changes. Automatic flash units (whether for digital or film-based cameras) however, adjust the power or the duration of the flash to suit whatever this distance may be. They have a sensor on their front portion that measures the amount of light falling on the subject, and controls the duration of the flash depending on how close or how far the subject is. The sensor switches off the flash when the right amount of light has covered the subject. (Further on in this article, we will discuss problems in using automatic flash with light-toned surroundings.)

Dedicated flash

Dedicated flash units are designed to work exclusively for one specific camera model or models in a series. Through the contact points in the bottom of the flash unit, they automate a lot of flash functions like setting the ISO rating on the flash, and the camera shutter to the flash synchronization speed. They also give a flash-ready signal in the viewfinder so you won’t have to turn your eyes away from the camera in order to look at the flash unit. While the dedicated flash is recycling, it turns the camera back to available light measurement.

The most sophisticated dedicated flash units are capable of OTF (off the film) metering, that is, they measure the light hitting the film during exposure. This system makes flash photography simpler and almost foolproof. These flash units can also take into account the ambient light (“existing light”) for hassle-free fill flash photography. (All these years shooting pictures, I never could understand fill-flash ratios!)

Salgado (world's best photojournalist) and flash

Sebastiaŏ Salgado is considered as the best photojournalist in the world today. He comes from an affluent Brazilian family and has taken up graduate studies in economics in France. Yet, his pictures have always been of struggling workers, the powerless and the dispossessed. He didn’t have any interest in photography until his wife, an architect, gave him a camera as a gift. The very first time he looked through the viewfinder, he was hooked on photography. Know what? Salgado doesn’t use flash when shooting his pictures, relying only on available light. That does it! First thing tomorrow, I’m going to throw away my flash!

Thursday, October 25, 2007

Photojournalism (33): Photo essays using the chronological approach

Update as of September 18, 2023:

If you’re a high school or grade school student in the Philippines who’s joining the photojournalism contest in the division, regional, or national press conference, I’m offering two free resources to you :

A. 900-plus interactive exercises on English grammar, vocabulary, reading comprehension, verbal analogy, etc (with around 200 megabytes total file size). The exercises have time limit and automatic scoring, with an average of 10 items per exercise.

Examples of these interactive exercises are: Common English grammar errors: Exercise 01 (nouns - confusions of number); Phrasal Verbs: Expressions with Go; English Placement Test (45 items).

B. 200-plus resources (JPG, PDF, MP4, etc.) on photography and photojournalism, with 600-plus megabytes total file size. For some examples of these resources, surf to the “Free photography e-books, cheat sheets” page.

For the download links and more information about how to use the interactive exercises, please surf to my “Better English resources and exercises” blog. Please inform your journalism teacher/schoolpaper adviser or your parents about these resources before downloading them.

If you have any question about downloading or using these free resources, please email me (after informing your journalism teacher/schoolpaper adviser or your parents). I’ll be able to reply to you within two to three days; if you don’t see my reply in your Inbox, check your Spam folder. Or, you can text me.

Also, if you win in the photojournalism contest at whatever level (district, division, regional, or national), you can send me your prizewinning pictures, and I will feature them in a blog post.

Atty. Gerry T. Galacio
gtgalacio@yahoo.com
0927-798-3138


Examples of photo essays:

Trouble Shared (Brenda Ann Kennelly/ New York Times/Lens); A Country Doctor (W. Eugene Smith/Magnum for Life); A Young Father’s Balancing Act (Benjamin Norman/The New York Times); New York City Coffeehouse (Dima Gavrysh/Lens); Where Beauty Softens Your Grief (Gianni Cipriano/ICP); Gun Nation (Zed Nelson); What the World Eats (Time); Last Supper (2004; Celia A. Shapiro/Mother Jones); The Bitter Sweet Pill – GMB Akash; Happy Horsemeat (Alex Soth)

Unusual photo essays:

February Assignment: Photographing Pictures in Reflection; Magic in the Nearly Forgotten Mailbox; Andrew Moore Detroit; Superheroes – Dulce Pinzon; A Photo Fright Most Viral; Jump Book – Phillippe Halsman

Relevant article: “Week Five_The Photo Essay” from CUNY Graduate School of Journalism (topics include kinds of shots like signature shot, process, interaction, clincher, etc., and how to structure your narrative)

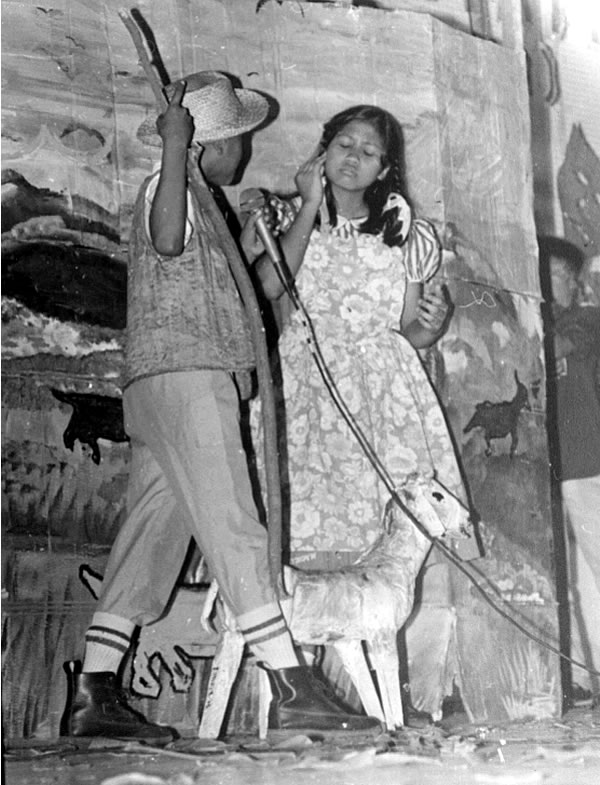
In using the chronological approach, you follow as events unfold before you, and you shoot your subject over a period of time. A simple example of a photo essay is that of the two pictures below where a little lamb makes friends with the freshmen and then finally gets the limelight as it performs on stage. Baa! Baa!


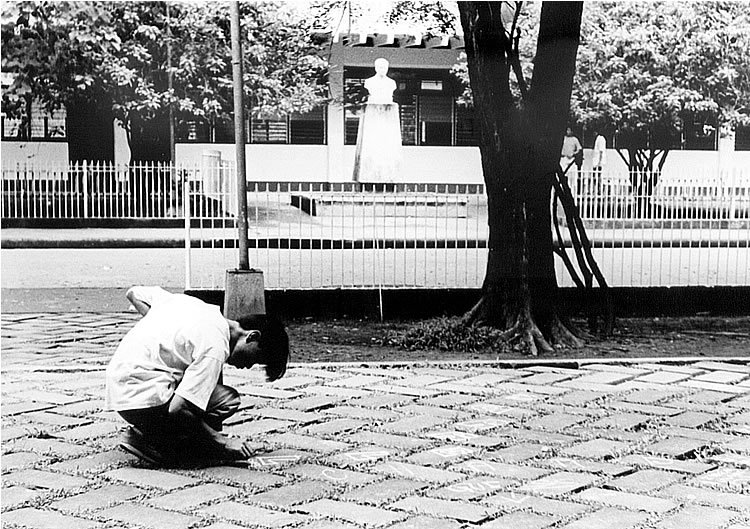
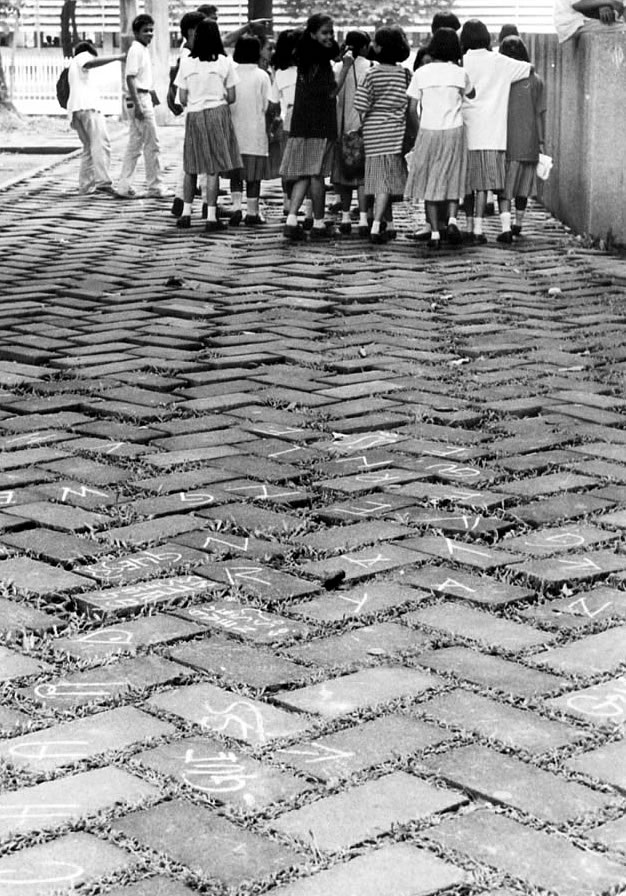
In the photo essay below, I shot a high school student writing the names of his friends on the hollow blocks. (Please take note of the bust of Dr. Jose Rizal on the background of the first picture.) He was only using a piece of chalk, and so I didn’t scold him. He didn’t see me shooting him while he was writing on the hollow blocks. Later on, after he left, I got a medium shot of the letters he wrote on the blocks. As a final shot, using the vertical format, I shot the letters on the blocks, with a group of students walking away on the background.


Sequence shots can be a chronological photo essay

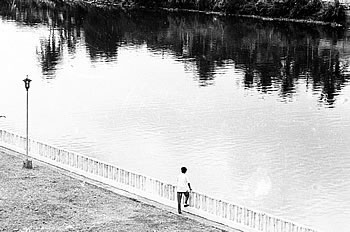
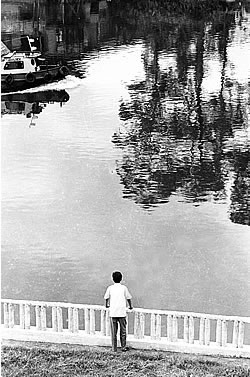
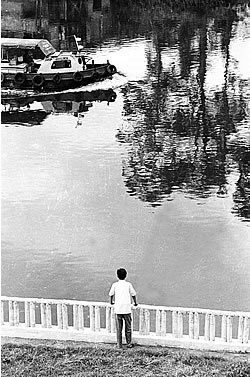
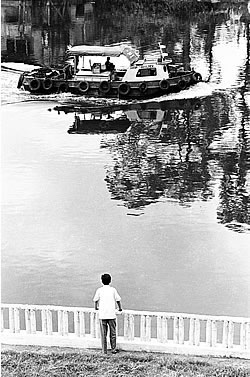
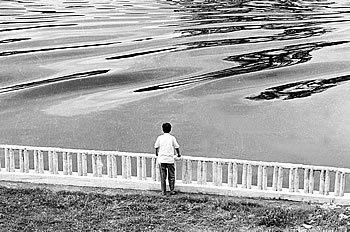
In the pictures below, I asked my Class 1990 yearbook staffer Eric to pose by the dike at the back of Rizal High School in Pasig. I was on the 3rd floor of a building with my beloved Canon AE-1 Program camera fitted with a Vivitar Series 1 70-210 mm lens. (Believe it or not, I bought this 2nd hand zoom lens in a barbershop in Blumentritt, Manila.)  

I wanted to express the contemplative mood and loneliness a senior normally goes through as graduation time comes near. I just wanted two elements in my picture - Eric and the still waters of the Marikina River flowing behind the Rizal High School campus in Pasig. The first two pictures of the scene below were the ones I needed to express what I wanted.

But then, I saw the tugboat coming from the left. I switched on the power winder of my camera. I shot about 20 frames all in all as the tugboat passed Eric and created ripples on the water. Serendipity! I had a photo essay which could be used to illustrate life cycles, transient moments, peace and serenity, consequences and change!
 
(If you mouse over the pictures, the captions will appear for about five seconds. If you continue to move your mouse over the picture, the caption will stay visible.)


Pssst, Eric! It has been sixteen years since 1990 when I asked you to pose by the dike. You can move away from the dike now, and go on with your life, okay?

Thursday, October 18, 2007

Apollo Moon Documentary Bears Witness
for a Creator


By Mark Ellis, Senior Correspondent, ASSIST News Service

LONDON (ANS) -- A film documenting the Apollo moon project using rare footage from NASA contains numerous spiritual references pointing to the existence of God.

“In the Shadow of the Moon” opened September 7th to positive reviews, including a “Critic’s Choice” designation by the L.A. Times and an award at the 2007 Sundance Film Festival.

“It’s a film about the experience of going to the moon told by the people who went – in their own words,” says David Sington, who directed the film. One of Sington’s associates got acquainted with Dave Scott, commander of Apollo 15 and the first man to drive on the moon. “They wanted to organize a reunion of moonwalkers,” Sington says. “That grew into an idea of doing a reunion on film.”

Producer Duncan Copp proposed the idea of a documentary to Sington, who said it took him only 15 milliseconds to decide on the project.

With astronaut Scott’s help, the film team managed to assemble crewmembers from every Apollo mission that flew to the moon and interview them directly on camera. The 10 astronauts – now in their seventies – come across as surprisingly reflective and human. Many spoke of the profound impression they gained from walking on the lunar surface and gazing back at a marble-sized planet Earth.

Film director SingtonIn addition to the interviews, producers Duncan Copp and Chris Riley spent weeks at NASA’s film library in Houston pouring through cans of film – many of which had not be opened for 30 years. They uncovered a veritable treasure trove, which the filmmakers re-mastered to produce a film of striking visual clarity.

Apollo 16 astronaut Charlie Duke, the 10th man to walk on the moon, makes an explicit declaration of his faith in Jesus Christ on camera. His spiritual revelation came after his retirement from the space program in the mid-seventies. Mounting pressures in business and his personal life caused Duke to grapple with life’s ultimate questions. In 1978, after he attended a Bible Study about Middle East prophecy, Duke realized Jesus “really is the Son of God.”

Astronauts Edgar Mitchell and Gene Cernan described profound spiritual experiences, but not within a specific Christian context. Cernan discovered the universe seemed to have purpose behind it, that there must be a Creator who stands above the religions of mankind.

Earth crescent from the moon“Edgar Mitchell’s experience profoundly changed and shaped his whole life,” notes director Sington. “He had a moment of epiphany – suddenly grasping who he is in relation to the universe. This was accompanied by a sense of ecstasy, almost like people who have had visions of the Virgin Mary.”

“He’s striving to understand his spiritual epiphany in scientific terms,” Sington adds. “He’s dedicated his life to understanding human sub consciousness and to finding the ‘Great Mind’ of the universe.”

Unfortunately, the man who had the closest encounter with Jesus Christ on the moon does not appear in the film. “Sadly enough, the person who had the most profound spiritual experience was Jim Irwin, who died,” says Sington. “He really had a ‘road to Damascus’ experience on the moon.” Irwin died in 1991 from a heart attack.

Astronaut Cernan saluting the flagIn Irwin’s book, “To Rule the Night,”he described his view of Earth from the moon, which looked like “a beautiful, fragile Christmas tree ornament hanging against the blackness of space.” The beauty of the mountains of the moon moved Irwin, and he said he felt the presence of God during his moonwalk. “The moon has a powerful force; it seems to affect the feelings and the behavior of everybody. I cannot imagine a holier place,” he wrote.

Some would consider the trip to the moon as one of man’s greatest accomplishments, but Irwin had a different perspective. Afterward, he frequently said, “I believe Jesus Christ walking on the earth is more important than man walking on the moon.”

Irwin retired from NASA in 1972 and founded High Flight, a Christian ministry. He traveled frequently and spoke to groups about the ways his experiences in space increased his awareness of the presence of God.

“My view is that all of them were profoundly affected by the experience of leaving the Earth and seeing the Earth in its true context,” Sington says. “The photographs they took were a revelation to everybody that helped shape the way we think of ourselves on the Earth,” he notes.

Some might consider the awareness gained by the men who walked on the moon as the ultimate mountaintop experience. “They had the experience firsthand, which is a different order of experience.”

Many of the astronauts saw the universe as fundamentally sterile, a seemingly endless dead expanse. By contrast, Earth appeared to be a very special oasis -- almost Edenic, and yet fragile. For some, this increased their environmental awareness, as well as a sense of gratitude about living on planet Earth. “They feel life in a slightly stronger way than the rest of us,” Sington observes.

Apollo 11 astronaut Mike Collins, the most affable of the astronauts to appear on camera, described a moment of exaltation in his orbiter as he realized he was alive in a place where there was no other life.

One of director Sington’s disappointments was his inability to persuade Neil Armstrong to abandon his notoriously reclusive nature and appear in the film. “I think I understand why he doesn’t want to talk about being on the moon,” Sington says. “He sees himself as a messenger, not the message, a representative of all of us. He takes that very seriously.”

Sington came away from the film more inclined to accept a spiritual dimension to life. It also made him a bit more optimistic about the future, based on the Apollo project’s demonstration that human societies – particularly democracies -- are capable of large-scale collective efforts apart from waging war.

“In some sense perceiving reality is spirituality,” Sington concludes. “Religion and Christianity says we’re missing what’s really important,” he says. “When you see things as they really are you get a more profound spiritual sense.”

“In the Shadow of the Moon” is rated PG for mild language, brief violent images, and incidental smoking.

[ASSIST News Service, PO Box 609, Lake Forest, CA 92609-0609 USA; Visit ANS website at: http://www.assistnews.net/ -- E-mail: assistnews@aol.com]

P.S. You might also want to play this Flash movie "God of Wonders" by Tim Gibson. My personal preference is still the traditional hymns but Gibson's movie is quite appropriate after you have read Mark Ellis' article posted above.


Photojournalism (32): Photo essays and themes

Update as of September 18, 2023:

If you’re a high school or grade school student in the Philippines who’s joining the photojournalism contest in the division, regional, or national press conference, I’m offering two free resources to you :

A. 900-plus interactive exercises on English grammar, vocabulary, reading comprehension, verbal analogy, etc (with around 200 megabytes total file size). The exercises have time limit and automatic scoring, with an average of 10 items per exercise.

Examples of these interactive exercises are: Common English grammar errors: Exercise 01 (nouns - confusions of number); Phrasal Verbs: Expressions with Go; English Placement Test (45 items).

B. 200-plus resources (JPG, PDF, MP4, etc.) on photography and photojournalism, with 600-plus megabytes total file size. For some examples of these resources, surf to the “Free photography e-books, cheat sheets” page.

For the download links and more information about how to use the interactive exercises, please surf to my “Better English resources and exercises” blog. Please inform your journalism teacher/schoolpaper adviser or your parents about these resources before downloading them.

If you have any question about downloading or using these free resources, please email me (after informing your journalism teacher/schoolpaper adviser or your parents). I’ll be able to reply to you within two to three days; if you don’t see my reply in your Inbox, check your Spam folder. Or, you can text me.

Also, if you win in the photojournalism contest at whatever level (district, division, regional, or national), you can send me your prizewinning pictures, and I will feature them in a blog post.

Atty. Gerry T. Galacio
gtgalacio@yahoo.com
0927-798-3138


Examples of photo essays:

Trouble Shared (Brenda Ann Kennelly/ New York Times/Lens); A Country Doctor (W. Eugene Smith/Magnum for Life); A Young Father’s Balancing Act (Benjamin Norman/The New York Times); New York City Coffeehouse (Dima Gavrysh/Lens); Where Beauty Softens Your Grief (Gianni Cipriano/ICP); Gun Nation (Zed Nelson); What the World Eats (Time); Last Supper (2004; Celia A. Shapiro/Mother Jones); The Bitter Sweet Pill – GMB Akash; Happy Horsemeat (Alex Soth)

Unusual photo essays:

February Assignment: Photographing Pictures in Reflection; Magic in the Nearly Forgotten Mailbox; Andrew Moore Detroit; Dulce Pinzon (The real story of the Superheroes; A Photo Fright Most Viral; Jump Book – Phillippe Halsman
One way of teaching yourself to be more selective in your shots is to do a photo essay. Unlike indiscriminate shooting of subjects (or even a photo sequence), a photo essay requires planning: what to shoot, how to best shoot it, how this picture contributes to the essay, etc.

Limiting the topic for your photo essay

We’re all familiar with writing essays or themes for our English or Filipino subjects. What do teachers emphasize before you write out that essay? Limit your topic. The same advice holds true for a photo essay:

1. Decide first what your general topic or your subject will be - people, places, events, programs, universal truths, etc.

2. After deciding on your general topic, the next step is to come up with a limited topic. People- concentrate on one person or a specific group; places - your school, your community; activities - enrollment, graduation, summer class; universal truths - love between a mother and child, pizza’s the best thing ever to happen in history...

Using themes for your photo essay

A photo essay can make use of certain themes. Various pictures taken in different places, different times of the day, can be grouped together to illustrate a certain theme, whether serious or lighthearted, significant or trivial, like the pictures below which show students using chairs in creative ways other than sitting on them.

Photo essays and themes; photo by Atty. Galacio
Photo essays and themes; photo by Atty. GalacioSpeaking of themes ... if you have seen the Oscar best picture for l989, “The Last Emperor” directed by Bernardo Bertolucci, then you probably know that the recurring thematic device used all through the movie was the opening and closing of all kinds of doors or entrances.

Relevant article: “Week Five_The Photo Essay” from CUNY Graduate School of Journalism (topics include kinds of shots like signature shot, process, interaction, clincher, etc., and how to structure your narrative)
Vary your shots

In whatever way you develop your photo essay, thematically or chronologically (we’ll discuss this next time), you have to vary your shots, your viewpoints. Use close-ups, medium shots, full shots and long shots. You have to employ a variety of lenses. You have to shoot at different times of the day; use different viewpoints (eye level, low and high). You also have to shoot using both horizontal and vertical formats.

Kinds of pictures in a photo essay


In a written essay, you have the introduction, the body, and the ending or conclusion. In a photo essay, you would need different kinds of pictures - (1) establishing shots to show your viewers the setting or context of your subject; (2) major actions, stages or developments, to illustrate your theme or subject: (3) minor pictures which can serve as transitions; and, (4) pictures that will effectively close out your photo essay.

In a written essay, you always try to end it with a punch, with a line or expression that gives it a sense of completeness, a sense that nothing has been left hanging. With a photo essay, you try to end it with a picture that also brings a sense of completeness. In literature, we call this sense of completeness as “catharsis” which means a purgation of the negative emotions created within the reader. In Hollywood film making and scriptwriting, it’s called “closure” which means that the ending must provide a sense of completeness, a sense that everything has been resolved satisfactorily.

National Geographic Live! - Alison Wright: Portraits of the Human Spirit: After confronting her own mortality in a near-fatal bus crash, photographer Alison Wright dedicates her career to capturing the human spirit through her photographs and writing.