
“When I consider the heavens, the work of your fingers, the moon and the stars, which You have ordained, what is man that You are mindful of him?”
Psalms 8: 3, 4
 Long before the modern movie classic “Schindler’s List” secured Steven Spielberg’s place in cinematic glory, he directed a movie blockbuster titled “Jaws.” Starring Richard Dreyfuss, George Shaw, and Roy Scheieder, the movie told the story about how the small tourist town of Amity was terrorized by a great white shark weighing about a thousand pounds. Hmm, sounds like somebody I know!
In one exciting scene, when the shark was attacking their boat, Dreyfuss, playing the role of a scientist, screamed at Scheieder, the captain, to position himself at the edge of the boat. Scheieder, who was holding on to dear life as the shark began to chew up the boat, screamed back, “What the hell for?” And Dreyfuss, the cool analytical scientist who was holding a camera at that time, explained, “I need you for scale!”
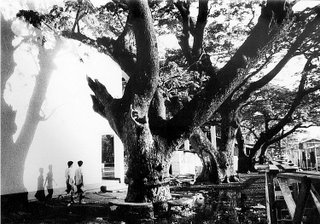
Dreyfuss was saying, in terms of photography, that it wasn’t enough to simply take the picture of the shark. Why? Any viewer who looks at the picture will not have a clear idea as to how huge the shark was. With Scheieder in the picture, the viewer will have a visual guideline with which to estimate the size of the shark. Take the picture above of the acacia tree. By including the students seated around the tree, I was able to give the viewers an idea of how massive the tree is.
 How tall is that tree in the picture above? By including the child at the lower right hand corner, I can give the viewers an idea as to how high the tree is.


 How small is that kitten in the picture above? How big are the letters being painted on the roof by the worker in the second picture? How big are those stone letters spelling out “paaralan” in the third picture? How big is a river tugboat in the last picture?
In order to give your viewers an idea of their relative sizes, you need to include certain elements (the student in the first picture, the painter in the second, the construction workers in the third, the student in the last picture) in order to help guide the viewer in judging their sizes.
How to Achieve Scale
Friday, August 03, 2007
Photojournalism (15): Scale


Wednesday, August 01, 2007
Photojournalism (14): Quality and direction of light
| Free articles and cheat sheets from Digital Camera World (Tech Radar): Best camera settings for sunsets (free photography cheat sheet) How to predict the angle of sunrise for the perfect landscape photography How to capture a silhouetted sunset Sunset photography: how to balance exposures and get accurate colours Color temperature scale (see also graphic at the bottom of this page) |
“In the beginning, God created the heaven and the earth. And the earth was without form and void; and the darkness was great upon it. And God said, Let there be light, and there was light. And God saw the light, that it was good.”
One thing I will emphasize over and over again is that without light, photography is not possible. When we discuss films later on, you will know that it is the action of light upon the silver halide compound that produces the image. Light really is good!
Always consider the quality of light
The main source of light for photography is the sun and as the sun moves across the sky, the quality of light changes. If you want to be a good photographer, you should always consider the quality of light.
(The sun doesn’t really move across the sky, as you will remember from your basic science. It’s just how things appear to us, okay? If I remember my college philosophy class correctly, the term is “phenomenological.”)
Avoid shooting at noontime


Avoid shooting, as much as possible at noontime; the harsh sun will create deep, ugly shadows underneath people’s eyes, like in the pictures above.

If both you and your subject are in the shade, then it’s okay to shoot. But avoid situations like in the picture above where the leaves of the trees create uneven, scattered areas of light and shadows. Some Filipino photographers call this the “chocolate effect.”
The golden hours
Photographers call both sunrise and sunset as the “golden hours” because these times provide a gorgeous light that’s very suitable for photography. At dawn, the light is dominated by soft pinks while at sunset, the colors become more golden. (See the color temperature graphic at the bottom of this page.)

With the picture above, I first noticed the “golden light of the dying sun.” Okay, okay, I know such descriptions are absolutely corny, but hey, girls just love this corny stuff! I got my beloved Canon AE-1 Program camera fitted with a 50 mm, f/1.8 lens and loaded with Kodak Gold 100. I asked my cute nephew JR (who looks like me) to stand in that spot. I wasn’t satisfied however with the set-up, and when I looked around, I saw my rocking chair. I got the chair, asked JR to sit on it, and he just naturally struck that great pose. JR really takes after me! I love that golden light, the deep black shadows, JR’s shadow on the rocking chair, the chair’s shadow on the wall ... I just love photography!

 With black and white photography, of course, we don’t talk about colors of sunrise and sunset. At these times, what you should look out for as your subject are dramatic, long shadows created by the sun’s position, like in the pictures above.
The direction of light
 |
| Free infographic from Digital Camera World / Tech Radar (click the image to see a larger-sized image) |
Train yourself to notice and to use aesthetically the direction of your light source. Look at the picture below for example; by the way that student’s face is illuminated and the long shadows behind him, you can guess (quite correctly) that the light comes from the late afternoon sun.
 There are primarily three ways by which a subject can be lighted: from the front, the side or the back.
1. Front lighting - your light source which may either be the sun or artificial light sources like your camera flash, comes from directly behind you. Front lighting gives you great colors and a lot of subject detail. On the minus side, these details are flat. Since your light source directly illuminates your subject, the shadows created are placed behind the subject. Your picture will be two-dimensional, lacking depth. (Remember our discussion of perspective and depth?)
By the way, speaking of shadows, W. Henry Fox Talbot, considered as the father of photography, defined photography as “the art of fixing a shadow.” We will discuss shadows (“cast” and “contained”) as a photographic subject later on.
A common source of front lighting is your camera flash. We will discuss later how to use your flash and the common problems in using it.
2. Sidelighting - this kind of lighting produces the strongest three-dimensional effects. In our discussion later on, you will learn that sidelighting is one good way of creating the illusion of depth in your pictures. Soft sidelighting, however, is best for portraits and landscapes.
 With portraits, avoid having half of the face in deep shadow with no details, and with the other half in strong highlight. Unless, of course, if you’re striving to create a highly dramatic effect. It’s usually better to have some details in the shadow side of the face, like in the picture above of a very pretty Girl Scout. (Professional photographers on this topic talk about the “split ratio” between highlights and shadows, but that’s too technical for us.)
3. Backlighting - generally, you should avoid shooting against your light source since this creates high contrast and greatly reduces details in your subject. The technical term for shooting against the light is “contra luz.” In French, it’s called “contre jour.” If you’re shooting portraits, for example, your background will turn out bright, while your subject’s face will turn out in deep shadows. That’s because your camera’s light meter will be fooled by all that background brightness.
Several ways of counteracting this problem are:
(1) to use white or silver colored boards to reflect some light back to your subject; and
(2) to use your camera flash to throw some light into your subject.
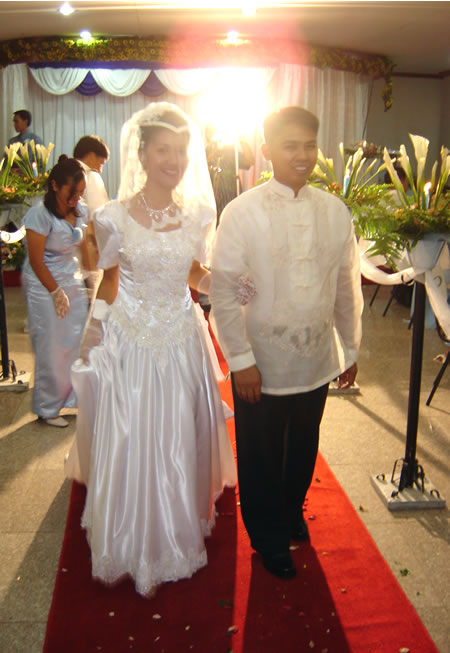 In the example at the left, I wanted to take the picture of the bride and groom as they were walking away from the altar. Problem was, I was shooting against a very bright video light. Using the flash of my borrowed digital camera, I was able to get some details in the faces of the bride and groom. The picture came out a good shot, capturing the drama, emotions and excitement of a wedding. (Hey, if you don’t believe me that this is a good picture, I won’t treat you out to pizza! For those of you who think this is a good picture, e-mail me and then we’ll have pizza!)
Photography books and magazines will tell you about how to use “fill flash” and “fill flash ratios” but these topics are a little bit complicated at this point in our series. Anyway, most modern cameras will automatically choose the correct setting for your flash even in difficult lighting situations.
If you have no choice but to shoot your subject however, you have to choose which is more important - the highlights or the shadows. If you choose to play up the background, you will be creating a silhouette. More on silhouettes later, I promise.
Be careful when you are shooting directly at the sun
You could seriously injure your eyes when shooting directly at the sun, as what happened to famous astronomer Galileo Galilei. He destroyed his right eye from constantly looking at the sun through his telescope. What you should do in this situation are:
(a) place a piece of paper between your eyes and the camera’s viewfinder to soften the light striking your eye;
(b) place the sun to the side, and if possible, hide it behind objects like leaves or branches, as in the picture below.

 The camera flash as a light source
The camera flash is one of the most useful accessories for any camera system, whether an SLR or a compact 35 mm compact, digital or film-based. In a lot of situations, you’ll only be able to shoot if you have a flash on your camera. But a flash often creates harsh shadows and flat lighting that often destroys the mood of a picture. (In some instances, like theater presentations, you may not be allowed to shoot pictures as this will destroy the lighting set-up.)
Thus, photographers often use “available light” (a.k.a. “existing light” or “ambient light”). This means using film with a high ISO rating, slow shutter speeds and wide apertures, and sometimes placing the camera on a tripod.
Speaking of flash … Sebastião Salgado is considered as the best ever photojournalist in the world. Born into an affluent Brazilian family, he took graduate studies in economics in France. Yet, his pictures have always been of struggling workers, the powerless and the dispossessed. He didn’t have any interest in photography until his wife, Leila, an architect, gave him a camera as a gift. The very first time he looked through the viewfinder, he was hooked on photography. Know what? Salgado doesn’t use flash when shooting his pictures, relying only on available light.
That does it! First thing tomorrow morning, I’m going to throw away my flash!
Relevant discussion on color temperature and color wheel: Photojournalism (8): Color or black and white?
 |
| Color temperature scale (free cheat sheet from Digital Camera World / Tech Radar) |
Monday, July 30, 2007
Photojournalism (13) : Cybill Shepherd, Ryan O’Neal, Mary Stuart Masterson, Robert Downey Jr, love, friendship, second chances, and a roll of film
The perceptive ones among will have noticed by now one or two things, maybe three, about the pictures I have used in this series on photojournalism.
One, most of the pictures are black and white. That’s because black and white photography is my personal choice for artistic expression. I’m not really good in choosing colors or color combinations. What I do know about colors is that I really like green, brown and blue.
Two, as you mouse over the pictures, you will see certain data about the pictures – when and where the pictures were taken; the specific topic the picture is being used to illustrate, and the person who took the picture (ehem! ehem!)
Three, the pictures were taken many, many years ago, and thus, to the perceptive and technically minded persons among you, they appear to have diminished somewhat in terms of quality. Some of the pictures (primarily taken on Kodak Tri-X, my favorite monochrome film) I have managed to have digitally scanned into CDs. For most of the pictures in this series, however, I have been processing them in this way:
(1) Using Microtek Scanmaker 3800, I scan the black and white pictures with the options – true color, 150 dpi, BMP file format;
(2) Using Adobe Photo Home Deluxe Edition, I convert the BMP pictures into black and white pictures in JPEG format; and
(3) Using Macromedia Fireworks MX, I edit and optimize the pictures – cropping, sharpening, and fiddling with the auto levels or brightness and contrast controls.
Photography and technology
“From today, painting is dead!” This was the cry of doom and despair by French painter Laroche way back in 1839 when photography was introduced to the world. History has proven him wrong, however; painting is still very much a flourishing art form. With the advent of personal computers and their revolutionary impact on almost all aspects of life, it seems it’s now the turn of photographers to exclaim, “From today, photography is dead!”
Photography is a technology based art form. Since 1839, it has always been a silver halide based art form, meaning we’ve got to have film in order to have pictures, until today that is. Now, computers and cameras have been combined to produce film-less digital cameras.
As I told you, it’s now very, very, very difficult to find here in the Philippines black and white photography materials - film, photo paper, darkroom chemicals like developer and fixer. Two years ago my cute nephew JR, who looks a lot like me, took up photography in DLSU. He told me that his batch was the last to use film-based photography. The next year, he said, DLSU was turning to digital photography.
An advertising executive told me that several years ago Kodak was planning to phase out film and replace it with digital technology. But one photo magazine I scanned in SM Megamall said that Kodak’s digital photography business grew by only about one percent and that film has made a comeback. Hoo-ya! I love the smell of developer and acid fixer in the morning!
The picture below (circa 1992) shows you some of my former journalism students and our makeshift, no ventilation, dinky darkroom where we developed our black and white films, and printed out our pictures using Oriental glossy photo paper and Atlas developer and fixer.
 Anyway, please let me tell you a story about a movie that centered on a roll of film.
Chances are that you have seen the movie “Chances Are” starring Cybill Shepherd, Ryan O’Neal, Robert Downey Jr and Molly Ringwald. It has been shown on Channel 9 several times already. It’s a feel good movie which tells the story of a journalist who took a picture of a corrupt judge accepting a bribe from an accused whom he had set free earlier. The man who dies quite unexpectedly leaving a lonely widow played by Cybill Shepherd, manages to convince the angels at heaven’s gate that it wasn’t his time yet, and he is given a chance to go back to earth in the body of Robert Downey Jr. The angel however fails to erase all the memories of the man’s past life from Downey’s psyche.
Twenty three years later - after the pictures were taken, after the man died, after the character played by Downey was born, after the birth of Cybill’s daughter played by Mary Stuart Masterson - well, she falls in love with Downey. But since Downey’s character had all the memories and mannerisms of Cybill’s husband, guess what happens when daughter brings the young man home to mama?
You guessed it - Downey falls in love with Cybill, much to Mary’s bewilderment, Cybill begins to care for Downey, and to add to the fun and confusion, Ryan O’Neal, who plays Cybill’s best friend, has been waiting patiently for 23 years to win Cybill’s affections.
Well, all things end well. Downey falls in love with Mary after the angel finally catches up with him and erases all memories of Cybill’s former husband from his psyche, and Ryan finally weds Cybill, their longtime friendship finally blooming into love!
Oh, and the corrupt judge also gets to be finally exposed for what he was; Cybill finds the roll of film taken by her husband 23 years earlier, has it processed, and the picture of the judge accepting a bribe gets published in all the newspapers.
You might ask, what’s the point of this mini movie review? Well, the roll of film gets processed after 23 years. It is highly improbable for that roll of film to still retain the latent images after that long period of time!
Well, it’s just a movie of course, and technical things like these should not get in the way of love, friendship and second chances. We’re all suckers for sappy love stories and wonderful endings! Besides, what did poet Samuel Taylor Coleridge say about fiction? He said, “Fiction is the willing suspension of disbelief.”
Friday, July 27, 2007
Photojournalism (12): Reading pictures
By force of habit and training, in much the same way we read any piece of text, we look at pictures from left to right. Since our eyes tend to linger or to stop at the right side of the picture:
- most of the time, subjects should be placed at the right side of the frame; and
- elements at the left side of the frame can be used to lead the viewer’s eyes toward the subject.
 Anyway, since he was looking to the left, and there were only walls behind him, I placed him on the right side of the picture. I knew however that with such a set-up, there would be a lot of empty spaces on the left side. I waited for a while for something to happen. Then I saw these three students walking toward us. They were just the right lead-in element I needed! When they were just in the right spot, I took the shot.
Be a better writer or editor through StyleWriter 4: this software checks 10,000 words in 12 seconds for hundreds of style and English usage issues like wordy and complex sentences, passive voice, nominalization, jargon, clichés, readability, spelling, etc. StyleWriter 4 graphs your style and sentence variety, and identifies your writing habits to give an instant view of your writing. You can learn to adjust your writing style to suit your audience and task. You can learn, for example, the writing style of Newsweek, Time, The Economist, and Scientific American. StyleWriter 4 is widely used in the US federal government (for example, the Environmental Protection Agency). It can be used by educators, students, and professionals in various fields - business, law, social or physical science, medicine, nursing, engineering, public relations, human resources, journalism, accounting, etc. Download your free 14-day trial copy now. |
Wednesday, July 25, 2007
Photojournalism (11): Creative writing through seeing
Martha Foley’s short story “One With Shakespeare” chronicles a young girl’s exquisite discovery of her talent for writing. Through the encouragement of her high school teacher, the girl realizes that just like Shakespeare, she also had that creative potential, that “spark of the divine fire.” She begins to savor the emotions, the expressions, the ideas her words could bring forth. She begins to learn how to create memorable images in the mind’s eye through words. Looking out the windows of the library, she sees the flower filled trellis and her mind is filled with images of “black sentinels against the sky.”
Perhaps your talent isn’t in photography but in creative writing or journalism. But this series on photojournalism can still help you through an activity known as “writing through seeing.” Sometimes, you run out of ideas or topics to write about. What you can do is to look at the pictures in this series, and use them as your inspiration, as starting points for writing descriptions, narration, expositions, dialogues, short stories, etc.
 For example, you can write a description of your feelings as you look at the solitary branch against the sunset above. Write about the glorious sunsets in Boracay when you went there last summer. Write about how you felt, what you thought about as you and your family spent time together along Baywalk. Write about how you felt getting turned down for the tenth time by the same girl (ouch!)
 You can use the picture above of the guy up on a tree to learn how to write dialogue; notice that the girl with a white T-shirt is looking up at the guy, and there’s a heart-shaped piece of paper with the words “Happy Valentine” on the tree.
Nurture the “spark of divine fire” within you
In my 12 years of teaching, two of the best student writers I ever had the pleasure of teaching were Mylah Reyes-Roque (from Rizal High School in Pasig, Class ’87; she recently won a UNICEF award for her Newsbreak magazine article on child prisoners), and Cyrille Cucio from Quezon City Science High School Class ‘84.
But Cyrille went into medicine, rather than journalism or creative writing. When we met several years after high school, I told Cyrille that I was disappointed with her because she wasted her talent for writing. Well, writing’s loss is medicine’s gain, I suppose... or she could be the next Arturo B. Rotor of Philippine literature! In case you’ve forgotten, Rotor, a medical doctor, wrote the classic short story “Zita.”
Whatever your talent may be, nurture it, share it. That talent, that "spark of the divine fire" is a gift from God.
Be a better writer or editor through StyleWriter 4: this software checks 10,000 words in 12 seconds for hundreds of style and English usage issues like wordy and complex sentences, passive voice, nominalization, jargon, clichés, readability, spelling, etc. StyleWriter 4 graphs your style and sentence variety, and identifies your writing habits to give an instant view of your writing. You can learn to adjust your writing style to suit your audience and task. You can learn, for example, the writing style of Newsweek, Time, The Economist, and Scientific American. StyleWriter 4 is widely used in the US federal government (for example, the Environmental Protection Agency). It can be used by educators, students, and professionals in various fields - business, law, social or physical science, medicine, nursing, engineering, public relations, human resources, journalism, accounting, etc. Download your free 14-day trial copy now. |
Monday, July 23, 2007
Photojournalism (10): Decisive moment
A lot of you have probably seen the movie “Dead Poets Society” starring Robin Williams and directed by Peter Weir. Remember what the character played by Robin Williams said to his students as they faced a wall filled with pictures of previous generations of students now dead and gone? “Carpe diem.” Or in the English language, seize the day; seize the moment. This day, once the sun has set, will be over forever. This moment, once it has occurred, will be gone forever. As Chairman Mao Zedong also said, “Seize the day! Seize the hour!” But he probably wasn’t talking about photography ...
Greatest appeal of photography: capturing the decisive moment
The greatest appeal of photography to a lot of people is its ability to record an image, an action, a gesture, or an expression at a precise and unique, oftentimes never to be repeated moment in time and space. (As Sophia Coppola, daughter of world-renowned “Godfather” film series director Francis Ford Coppola once said in a magazine interview, “Painting takes too long. Photography is instant.”) For an example of an aesthetically-pleasing image taken at the decisive moment, look at the picture below of high school folk dancers practicing.
 The world-renowned French photographer Henri Cartiér Brésson described this moment as the “decisive moment.” When you shoot an image at the decisive moment, you create a visually, emotionally, and intellectually satisfying photograph. Photography more than any other creative art, can seize this decisive moment, this “one moment in time” as singer Whitney Houston describes it, when everything just falls neatly into place.
How do you capture this decisive moment, this one moment in time?
(1) Pay attention to what’s happening around you; don’t be like the photographer in the famous Kitkat chocolate commercial.
(2) Anticipate the moment.
(3) Watch the practices or rehearsals in your school’s activities, so you won’t be caught unprepared.
 What’s the decisive moment in the picture above? Well, it’s Field Demonstration time, and with an activity like this, the students acting as a group are always emphasized. They form various patterns and perform intricate movements with props such as hats, ribbons and fans. I wanted a picture that would express a person’s uniqueness or individuality rising above, as it were, the group’s collective identity.
I had already used up two rolls of Tri-X film (my favorite Kodak black and white film), shooting all the participants from various angles. I was down to the last four frames of my third and last roll. I chose a high viewpoint and pre-focused, using the small flagpole at the lower left side of the picture as my focusing guide. I had averaged my exposure; I metered the foreground at f/8, the middle ground at f/5.6, the sky at f/22. I set my lens to f/11. I had to do some “burning-in” later on in the darkroom to get the clouds.
Hey, don’t let all these numbers (f/5.6, f/22, etc) and terms like pre-focusing and averaging the exposure intimidate you, okay? We will discuss these topics later on, I promise.
Notice the girl at the lower right hand corner of the picture. She was tracing with her steps the boundary lines of the basketball court. When I saw this girl, I took the shot! Notice that her left foot is at the apex of a small triangle, with the edge of the picture forming the base of that triangle. I had the picture I wanted — the seniors making their entrance into the field, the juniors waiting for their turn to perform, and this girl! Notice also that lines are the most prominent element in this picture.
 I really don’t want to admit it, but I nearly missed taking the picture above. These students were burning on a cross their classmate who attended math class despite their agreement that everyone would do cross-stitching that day. Just kidding, okay? Actually, the students were doing a choral recitation of “Ang Gabi ni Armando Castro.” I didn’t follow the advice I gave you several paragraphs ago. I didn’t watch the practices, and I wasn’t paying attention to what was happening. Sorry!
When the students raised this cross, the flames started eating up the kerosene-soaked effigy in a matter of seconds. I just had enough time to raise my camera and shoot two frames. I had my Vivitar 70-210 mm Series I zoom lens set at 150 mm, and I opened up the lens to f/5.6 because I was shooting against the light. So remember, watch the practices and pay attention to what’s happening around you!
 Picture above, again, I didn’t watch the practices, and I wasn’t paying attention to what was happening. Sorry! As Alanis Morissette sang in “Ironic,” this was good advice I just couldn’t take! It was nearly lunch time, I was so hungry (pizza!), and I was busy talking to some pretty girls. The students were performing “A Man with a Toe,” I mean, “A Man with a Hoe.” I told you I was hungry! When I saw this great formation, I took two steps forward, raised my camera, and focused. I was able to take only one shot.


 The term “decisive moment” doesn’t only mean blockbuster actions or earth-shaking events. It may also refer to something so ordinary as a group of boys studying for the NSAT (first picture immediately above) and the fine singing form of the choir members in the second picture. It also refers to capturing great expressions (notice the eyes of the best actress in the third picture).
Luck sometimes plays an important role in taking a good photograph, but remember, the harder you work, the luckier you get! Or as a philosopher has put it, “Chance favors the prepared mind.” Of course, capturing the decisive moment presupposes that you have already mastered the basic skills. You can’t be fiddling around with your shutter speed dial or aperture setting ring, or trying to focus on your subject while the decisive moment is taking place! (More on these topics later on, I promise.)
| Be a better writer or editor through StyleWriter 4: this software checks 10,000 words in 12 seconds for hundreds of style and English usage issues like wordy and complex sentences, passive voice, nominalization, jargon, clichés, readability, spelling, etc. StyleWriter 4 graphs your style and sentence variety, and identifies your writing habits to give an instant view of your writing. You can learn to adjust your writing style to suit your audience and task. You can learn, for example, the writing style of Newsweek, Time, The Economist, and Scientific American. StyleWriter 4 is widely used in the US federal government (for example, the Environmental Protection Agency). It can be used by educators, students, and professionals in various fields - business, law, social or physical science, medicine, nursing, engineering, public relations, human resources, journalism, accounting, etc. Download your free 14-day trial copy now. |
While Cartiér Brésson has exerted perhaps the strongest influence on photojournalism, his influence is counterbalanced by another photographer, Robert Frank, who has been called the “master of randomness.”
Frank believes that it is the “random moment” rather than the “decisive moment” that best defines and portrays what life is all about. It’s difficult trying to explain in words the difference between a photograph shot at the decisive moment, and a photograph of the same subject shot at a random moment. It would be much better for you to look at Frank’s photographs to really understand what he’s trying to say.
In the late 1950’s, Frank went on a 14 month trip throughout the American continent. All in all, he shot 600 rolls of black and white film using a Leica camera. He later used just 83 images for his 1959 book “The Americans” which has been hailed by many people as the most influential book ever in the field of photography.
At 36 frames per roll, Frank must have shot a total of nearly 22,000 pictures, and out of these, he used only 83 pictures in his book. That means he used less than one half of one percent of all the pictures he shot! Boy, my calculator’s good! In the immortal words of Nancy, Sluggo’s partner in the cartoon strip, “Who needs brains when you’ve got a calculator and a fresh set of batteries?”
Decisive moment: Ansel Adams and “Moonrise”
Ansel Adams is a legendary name in photography; in fact, American Photo magazine once described him as “Mr. Photography.” Adams has more than 32,000 photographs hanging in museums and homes. He is best remembered (he died in 1985) for his hauntingly beautiful black and white photograph referred to as “Moonrise over Hernandez, New Mexico.” You can see what “Moonrise” is all about if you go to the Internet.
Taken in l941, a copy of “Moonrise” was sold in 1978 for over $2,000.00. Today, prints of “Moonrise” are reportedly sold for more than $20,000.00 each. It is the most financially successful photograph of all time. In 1989, during the 150th anniversary of photography, Popular Photography magazine picked “Moonrise” as one of the 15 greatest photographs ever.
How did Adams, who gave up a promising career as concert pianist in favor of photography, happen to shoot this picture, “an elegy in black and white” as one writer described it? He was driving along a highway when he saw the moon rising against a jet black sky, with the late afternoon sunlight bathing the crosses in a village graveyard. Adams stopped his car and rushed to set up his large format 8 x 10 camera. He only had enough time to take one shot before the light changed.
One shot, one memorable photograph, one really decisive moment ...
Decisive moment: chance favors the prepared mind
I’m sure you’ll remember that tragic bombing of the Alfred P. Murrah Building in Oklahoma City, USA on April 19, 1995 which claimed the lives of over a hundred men, women and children. (The bomber has since then been executed by lethal injection as punishment for his unspeakably heinous crime.) The next day, that bombing and the picture of a firefighter cradling a fatally injured one year old baby named Baylee Almon, were on the front pages of newspapers worldwide, and later on in the cover of Newsweek magazine. That picture touched the hearts of people all over the world. You might ask, what’s the name of the photographer who took that picture? Well, wrong question!
Actually, there were two amateur photographers who were able to take exactly the same picture - Charles Porter IV whose picture was distributed worldwide by Associated Press, and Lester “Bob” LaRue whose picture landed in the cover of Newsweek magazine. Porter had been working at his office when he heard the tremendous explosion. He grabbed his Canon EOS A2 camera with a zoom lens and rushed to the scene. The firefighter, Chris Fields, stood transfixed at that spot, amidst all the confusion and destruction, staring at the dying baby for about 30 seconds, giving Porter and LaRue the unplanned opportunity to take their shots.
One very memorable picture, one decisive moment, and two amateur photographers ...
Saturday, July 21, 2007
Photojournalism (9): Learning to see; techniques in developing your creative eye
| Free e-books: (1) Inspiration: The Pros’ Secrets to Finding and Keeping it (12 pages; 879.66 kb) (2) By Scott Bourne: Essays on Inspiration, Creativity and Vision in Photography (47 pages; 3.02 MB) Nine Motivational Essays on Photography (42 pages; 2.44 MB) Video: Developing a Creative Eye, Ep. 134: You Keep Shooting (Adorama Photography TV) |
Way back in 1989, I enrolled in a black and white photography course in an art school in Cubao. For the first assignment, the instructor asked the class to use one roll of film to shoot lines, shapes, form, textures, etc. In previous postings, I have explained and shown examples to you of these different elements of a photograph. On your own, therefore, using whatever camera you have, shoot as many pictures as you can of lines, shapes, forms, etc. This exercise will teach you how to break down an image into the different elements we have discussed.
Elegant simplicity
Later on you can combine these elements into a photograph that appeals to your own sense of beauty. Hopefully, other people will share your joy and sense of fulfillment over the pictures you have taken. My idea of beauty, if you care to know (please, please), is embodied in the Japanese ideal of “elegant simplicity.”
Charles Darwin, father of evolution, once said, “When I think of the complexity of the human eye, I shudder.” With the interplay of rods and cones which enable it, among other things, to distinguish numerous shades of colors, the human eye is so enormously complex that evolution fails dismally in explaining it. (Incidentally, two books I highly recommend to you are “Fearfully and Wonderfully Made” and “In His Image” by Philip Yancey and Dr. Paul Brand. These books about the wonders and complexities of the human body are readily available in Christian bookstores and in National Bookstore.)
 |
A basic principle you have to understand and always keep in mind is that the human eye and the camera see things differently. This is why, a lot of times, we get disappointed with the results of our pictures. Whenever we look at the subject we want to shoot, we always see a “focused” image, that is, a sharp image from foreground to background. This is because the eye, even without us consciously knowing or doing anything about it, adjusts itself to focus on whatever we are presently looking at, excluding other details in the scene. The camera cannot do this.
(If you’re using a manual focus camera, you have to turn the focusing ring until you get the right focus, that is, the image appears sharp and clear as you look at it through the viewfinder. With autofocusing systems, you just depress the shutter release a little bit and the camera automatically adjusts itself to focus on your subject.)
The difference in what the eye and what the camera see oftentimes result in a photograph that contains a lot of clutter or distracting details, which we didn’t notice while looking at the subject through the viewfinder. Take a look at the picture below (a choral competition) for example. When I was looking at the scene with the camera, I didn’t notice all the students at the background because they looked fuzzy or out of focus in the viewfinder. The camera however recorded everything - the performing students, and all the distracting details in the background.
 Later on we will discuss how to use lens openings and a shallow depth of field in erasing distracting background details. Notice for example the picture below of my cute nephew JR. (He’s cute because he looks like me!) Please notice that while JR himself is sharp and clear, the background details are deliberately blurred and out of focus.
 Professional photographers oftentimes derisively use the term “record shot.” Hey! “Derisive” is such a big word; I’d better check my dictionary to check if I got the spelling right! The term “record shot” is used to describe certain pictures that simply have to be taken for record purposes (to be redundant about it), or because the person paying for the photographer’s services simply wanted to have certain subjects shot. Meaning, there is nothing artistic in the subject matter or in the technique used; the photographer simply pointed his or her cameras at the subject, and took the shot.
Photographs have the power to convey a mood or share your insights
If you are using your camera just to do record shots, you are definitely missing out on what photography is all about as an art form. Photographs have the power to convey a mood or share your insights with others. All you really have to do is to begin seeing things, not just looking at them.
Remember what the fox said to the Little Prince? “What is essential is invisible to the eyes; one must look with the heart.” Photographers can see beauty where other people can only see mundane, crass, everyday things. Photographers, like all truly creative artists, have learned, as Walt Whitman (the father of free verse, the poet of democracy) once wrote, “to see beauty in a single blade of grass.” Wow!
Techniques in developing your creative eye
The question most of you must be asking desperately by now is, “How? How do I develop this visual awareness, this creative eye?” While some people are blessed with innate artistic talents, most of us can learn how to be creative with a camera. As Ernst Haas once said, “If art is aristocratic, then photography is its democratic voice.” The following are some of the techniques in developing your creative eye.
 Look at the picture above. Since you can’t turn your computer monitor upside down, stand up and then look at this picture with your head upside down. I know it’s a little bit acrobatic but hey it’s worth it! You will know what this picture is all about. The image of the trees, students and building are all repeated as reflections in the water in the foreground area. (This is probably the best picture I have ever taken in my life.)
I took this picture shown above way back in October 1989. I’ve noticed previously that every time it rained hard, the front area of the gymnasium of Rizal High School in Pasig would become flooded and there would be reflections on the water of the trees and that building on the background. I decided that this would make a good subject for a photograph. And so I brought my beloved Canon AE-1 Program everyday with me to school, and waited for the rain to come. I brought along my camera every day for one month, and it didn’t rain for one whole month! And so one day, I simply gave up and left my camera at home. Guess what happened? It rained hard that day!
I went home after the lunch break (pizza!), got my camera and loaded it with Negrapan (a black and white film manufactured in Spain). I knew I couldn’t use color film because the water was muddy brown in color; with monochrome film, it didn’t matter. I didn’t have a zoom lens at that time and so I used my Canon FD f/1.8 normal lens. I got back to school at around four in the afternoon. I focused on the reflections, and because it was late afternoon, I was forced to use a slow shutter speed of 1/30 sec. with an f/5.6 lens opening, for the right depth of field. (Later on we’ll discuss shutter speeds, lens openings and depth of field.)
[1] Pay attention to details
When you’re just starting to learn about photography, don’t consider anything too small, too trivial or too insignificant. The folk dancer in picture above has a V-shaped black ribbon on her costume; notice how the out of focus highlights on the background form an inverted letter V.

Pay attention to details! When you’re just starting to learn about photography, don’t consider anything too small, too trivial or too insignificant! If you look hard enough, you will notice that cute ribbon tied to my student's shoe buckle ... you know how vain girls are! I was able to take only one shot before my student kicked me away!

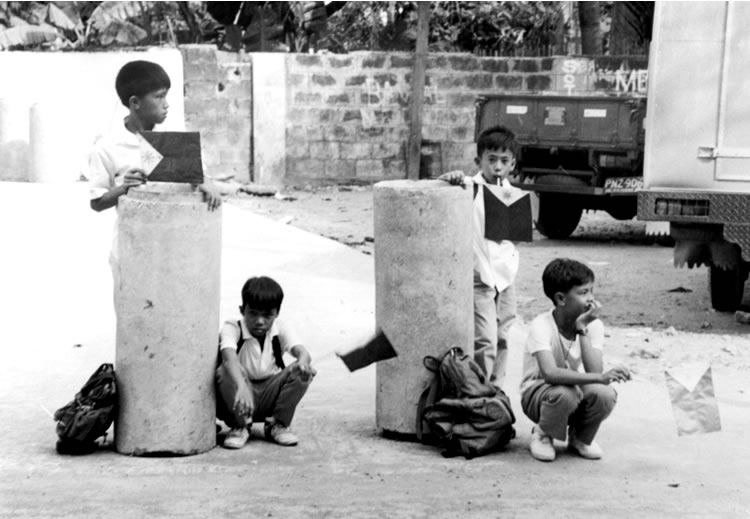
How many pipes are there in the picture above? Two. How many boys are standing up? Two. How many boys are sitting down? Two. How many boys are looking towards the right? Two. How many boys are looking towards the camera? Two.
[2] Learn from paintings, music videos, comic books, poetry, etc.
Look at paintings; watch good music videos. Look at comic books on superheroes; they have brilliant colors, subtle shadings, clean and dynamic lines. By the way, which superhero works as a photojournalist? Peter Parker, a.k.a. Spiderman!
Read poetry, short stories and other creative fiction, and then visualize in your mind the ideas, emotions expressed in them. One time, after reading Tennyson’s poem “Flower in a Crannied Wall,” I took my camera and for nearly a week, shot a lot of walls. I couldn’t find a single flower in a crannied wall but I did find a lot of small plants, a lot of moss between cracks in the walls, and our neighbors had a jolly good time watching me inspecting and shooting close-ups of walls in our compound!
[3] Practice visualizing things
In the novel “The Heart is a Lonely Hunter” written by Carson McCullers, Mickey, the main character, wanted desperately to learn how to play the violin. She drew a violin on a piece of cardboard, cut it out and then listened for weeks to the classical music being played by a neighbor. Wow, talk about visualization! What happened? Did Mickey become a world-class violinist? Of course not! What do you think this is, real life? Get real! This is fiction! Mickey became a waitress at the end of the novel.
[4] Look for symbolism and relationships
I took this picture way back in 1986 during the original EDSA Revolution. What are the symbolisms here? The soldier is the defender of freedom and democracy (symbolized by the Philippine flag in the background) and the child he’s carrying is the beneficiary of that freedom and democracy.

Look for symbolism and relationships. I tried to say in the picture above that students (represented by the bags) were waiting for the building to be finished. I know, I know, it’s really corny!

[5] Practice doing still life
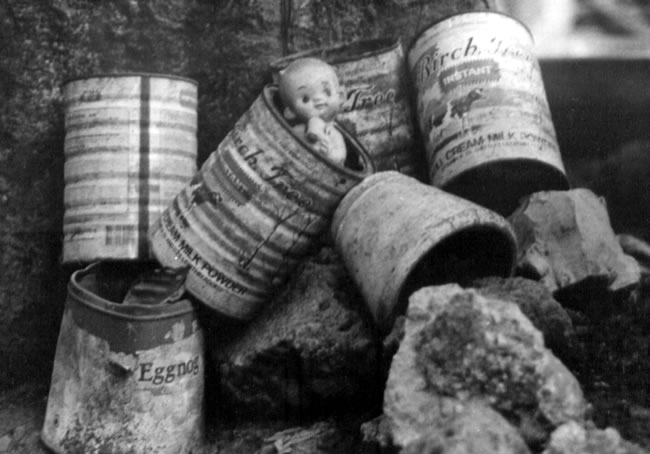
These milk cans in the picture below were rusting away near a santol tree. I’ve seen them several times before but I felt that they needed something else to perk up the image. I looked around, saw an old rubber doll my cute nephew (who looks like me) had outgrown, and placed it inside one of the milk cans.
Visualize Better Photos
Wednesday, July 18, 2007
Photojournalism (8): Color or black and white?
| Update as of September 18, 2023:
If you’re a high school or grade school student in the Philippines who’s joining the photojournalism contest in the division, regional, or national press conference, I’m offering two free resources to you : A. 900-plus interactive exercises on English grammar, vocabulary, reading comprehension, verbal analogy, etc (with around 200 megabytes total file size). The exercises have time limit and automatic scoring, with an average of 10 items per exercise. Examples of these interactive exercises are: Common English grammar errors: Exercise 01 (nouns - confusions of number); Phrasal Verbs: Expressions with Go; English Placement Test (45 items). B. 200-plus resources (JPG, PDF, MP4, etc.) on photography and photojournalism, with 600-plus megabytes total file size. For some examples of these resources, surf to the “Free photography e-books, cheat sheets” page. For the download links and more information about how to use the interactive exercises, please surf to my “Better English resources and exercises” blog. Please inform your journalism teacher/schoolpaper adviser or your parents about these resources before downloading them. If you have any question about downloading or using these free resources, please email me (after informing your journalism teacher/schoolpaper adviser or your parents). I’ll be able to reply to you within two to three days; if you don’t see my reply in your Inbox, check your Spam folder. Or, you can text me. Also, if you win in the photojournalism contest at whatever level (district, division, regional, or national), you can send me your prizewinning pictures, and I will feature them in a blog post. Atty. Gerry T. Galacio gtgalacio@yahoo.com 0927-798-3138 |
Look at the two pictures below of the athletic oval and Main Building in Rizal High School (Pasig City). One is in black and white, the other in full color. Which picture do you like better?

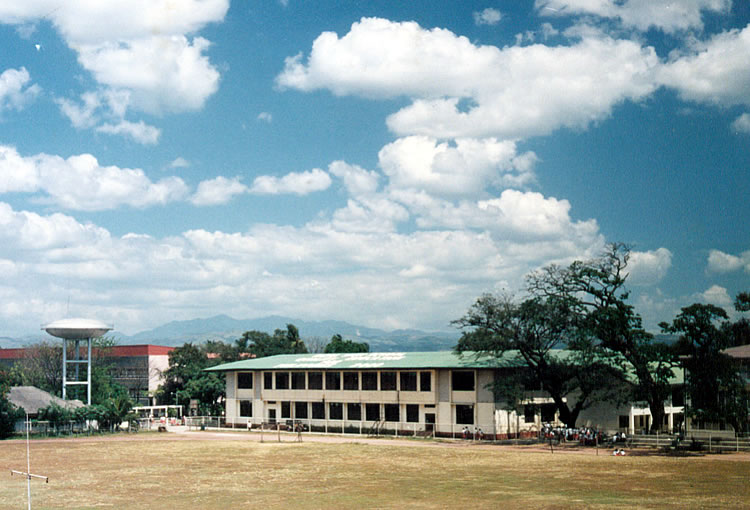 As I explained in the Introduction, this series on photojournalism is specifically meant for those of you who are schoolpaper staffers and participants to the press conferences, whether in grade school or high school, in whatever level (division, regional, or national). But if you’re none of these and just someone who likes photography, hey, you’re still welcome!
| Relevant materials: Color temperature scale (see also the graphic near the bottom of this page) Learn the Basics of Color Theory to Know What Looks Good Create Visual Depth in Your Photographs with Color (The Color Wheel) Color in photography: The color wheel explained Color Theory in Photography (Using complimentary, analogous, and monochromatic in photographs) |
Shooting black and white photos: think in various shades of gray
When you’re shooting black and white photographs, you’ve got to deliberately think of the various colors as being black, white, or shades of gray in the final picture. You’re forced to think of the image in terms of the basic elements - line, shape, form, tone, pattern, etc. (This is why shooting black and white photographs is an excellent way to learn photography.) As one Kodak advertisement puts it, “The absence of color ... the presence of imagination!”
“Colour my world ...” This is the title of a hit song by the group Chicago in the 1970’s back when Peter Cetera was still its lead singer and bell bottom pants were still in vogue. Peter Cetera has been going solo, and bell bottom pants now belong to museums for today’s generation to look at and say, “Yuck! How baduy!” The expression “colour my world” still best sums, however, the near-total dominance of color film and color pictures in the field of photography. Say “photography” and people will automatically think of color pictures.
With the advent of digital cameras, however, black and white photography has become and more marginalized, as it were. It’s very difficult now to find locally materials for black and white photography like film, photo paper, and darkroom chemicals. (If you are from Metro Manila, try looking for these materials in R. Hidalgo St. in Quiapo, Manila.)
Photojournalism used to be synonymous with black and white photographs
 |
| Shooting Black and White on your D-SLR free e-book by photoanswers.co.uk (7.15 MB, 22 pages) |
Most schoolpapers, elementary and high school levels, in the Philippines do not have the budget to produce publications in full color. (Some schools thus resort to the practice of producing two issues of a schoolpaper – a limited edition in full color for the group competitions, and another edition without color for distribution to the students.)
Speaking of budgets, Republic Act 7079 or the “Campus Journalism Act of 1990” gives the schools the right to collect schoolpaper fees, but for one reason or another, the Department of Education only allows voluntary contributions. Needless to say, schoolpapers have been having a difficult time financially, with the advisers oftentimes forced to shell out their own money.
Anyway, a good solution is for the schools to invest in digital cameras (the higher the megapixels, the better). Digital cameras have the capacity to shoot in both color, and in black and white. You don’t have to buy any film, unlike in traditional film-based cameras. After you’re through shooting, you just plug in your camera into the computer, and save or burn the pictures on your hard disk or a CD You can also transfer your pictures on a USB flash drive.
By whatever way you save your pictures from a digital camera, you can then bring them to the printing press. The press will then incorporate your pictures right into the electronically set pages, using Pagemaker, Coreldraw, Photoshop, etc. Also, if you had shot your pictures in color, it’s a whiz using these software programs to turn them into black and white pictures.
What about that heartwarming and blockbuster movie “Big” directed by Penny Marshall? Remember that last scene, that bittersweet separation as lead actor Tom Hanks walks away from Elizabeth Perkins, with gold, yellow, and orange leaves falling from the trees and swirling about on the streets? Would the scene be just as effective, just as poignant if it had been shot in black and white? I don’t think so. What’s my point? Some images look good in black and white, some really look good in color.
When you’re shooting in color, you’ve got to be aware of the color or colors within the image. This may sound basic (or even nonsense to some of you), but you have to admit that we oftentimes take color for granted. In one National Secondary Schools Press Conference in the late 1980’s, for example, the topic for the feature writing contest was this: “How do you explain the color red to someone born blind?”
Go ahead, try explaining it ... you’ll realize how we take colors so much for granted!
 |
| Color temperature scale (free cheat sheet from Tech Radar/ Digital Camera World) |
One way of classifying colors is to divide them into (1) warm and cool colors, and (2) harmonious and conflicting colors. (See the color wheel infographic from Digital Camera World below.)
Colors that tend to arouse warm feelings in people include yellow, orange, magenta, and red.
Cool colors that convey feelings of calmness or placidity are blue, mint, green, and cyan.
Conflicting colors are those found on opposite sides of the color wheel: red and cyan; blue and yellow; magenta and green.
Harmonious colors, which provide the viewer a relaxed, comfortable feeling, are those near each other in the color wheel: red and yellow; blue and magenta; green and cyan.
(Note: Click the image below to see a bigger-sized image of the color wheel infographic from Digital Camera World.)

| Relevant article and charts: Color Psychology: The Emotional Effects of Colors Color Meanings and Symbolism of Colors (charts) |
White - purity, classic, clean, airy, cool, pristine (but if overused with no contrasting colors , it can appear cold and sterile)
Gray - neutral, classic, cool, sober, practical, corporate , timeless, quality
Black - powerful, bold, strong, dramatic, expensive, magical, mysterious, sexy, sophisticated, prestigious
Blue - authoritative, dependable, professional, conservative, confident, serene
Green - fresh, springlike, outdoorsy, happy, lively
Red - exciting, hot, intense, passionate, dramatic, energetic, dynamic, daring, provocative
Two things you have to remember about the color red:
(1) Red is comparatively rare in nature.
(2) Red visually 'stands out' as compared to blue or green.
From Color to Black and White
Monday, July 16, 2007
Photojournalism (7): Element of perspective
| Update as of September 18, 2023:
If you’re a high school or grade school student in the Philippines who’s joining the photojournalism contest in the division, regional, or national press conference, I’m offering two free resources to you : A. 900-plus interactive exercises on English grammar, vocabulary, reading comprehension, verbal analogy, etc (with around 200 megabytes total file size). The exercises have time limit and automatic scoring, with an average of 10 items per exercise. Examples of these interactive exercises are: Common English grammar errors: Exercise 01 (nouns - confusions of number); Phrasal Verbs: Expressions with Go; English Placement Test (45 items). B. 200-plus resources (JPG, PDF, MP4, etc.) on photography and photojournalism, with 600-plus megabytes total file size. To avail of these free resources, email me with the following information: your name and school; the name and email address of your journalism teacher or schoolpaper adviser (or that of your parents); the division, regional, or national press conference that you’re joining. (I’ll be able to reply to you within two to three days; if you don’t see my reply in your Inbox, check your Spam folder. Or, you can text me.) Atty. Gerry T. Galacio gtgalacio@yahoo.com 0927-798-3138 |
Photographs are two dimensional objects; they’re flat with height and width but no depth (the third dimension). Remember our previous discussion of the x-, y-, and z-axis? We have already learned that the elements of forms and texture through lighting, highlights, and shadows can convey the illusion of depth. The best element, however, which enables a two-dimensional image to achieve the impression of being three-dimensional is “perspective.” The term refers to the relationships in space and the relative sizes of objects in a scene. It may either be linear or aerial.
 Linear perspective
Objects of the same size diminish in their apparent size the farther away they are from the photographer. On the other hand, a smaller object located closer to the camera will appear almost the same size as a larger object located at a farther distance. Examples are
(1) the students at the top of the picture seem smaller than the hollow blocks at the bottom portion;


(2) the guy in front, who’s hogging all the chairs for himself, appear much bigger than the other students who are located farther away from the camera; and
(3) the jeepney located nearer to the camera appears to be almost as wide as the building behind it.
With the picture of the students and the hollow blocks, what I really wanted to shoot was the graffiti on the hollow blocks. I held the camera to shoot in the horizontal format (more on formats later on) but I felt something was missing. Boy, I’ve always wanted to say something like this! Then I saw these students whose portraits I had just taken, walking off to return to their classes. I focused on the foreground, turned the camera vertically and included the students in the background. Just when I pressed the shutter release button, the girl in the middle wearing a dark T-shirt looked back at me. Serendipity!
Because of linear perspective, the hollow blocks in the foreground look much bigger than those in the background. Also, they seem to recede into the vanishing point. But that girl really makes the picture!
 Linear perspective, parallel lines, and vanishing points
You have probably learned from your geometry subject what Euclid, a Greek mathematician, the father of geometry, declared centuries ago. Euclid said, “Parallel lines do not meet.” Well excuse me, Mr. Euclid, Sir! In photography, parallel lines can be made to appear to converge as they recede into the so-called “vanishing point.” This is another aspect of linear perspective. Take a look, for example, at the posts of the waiting shed above which appear to become smaller and smaller as they recede into the background, and finally converging into the vanishing point.
Linear perspective and diagonal lines
A very easy, yet very effective way of creating depth is by using diagonal lines. Shoot your subject from the side, and you’ll get a diagonal line. To make a better photograph, anchor the corners with the diagonal lines. Example is this picture below of CAT cadets taking refuge from the downpour under the waiting shed, with the edge of the roof and the walkway as diagonal lines. (Depth is also created with the posts of the shed becoming increasingly smaller from left to right.)

Aerial perspective
Objects located farther away from the camera will appear lighter in tone or less saturated in color than objects located closer to the camera. This is caused by smoke, mist, fog, or atmospheric haze. “Aerial perspective” is another way of achieving a sense of depth in your pictures.


